
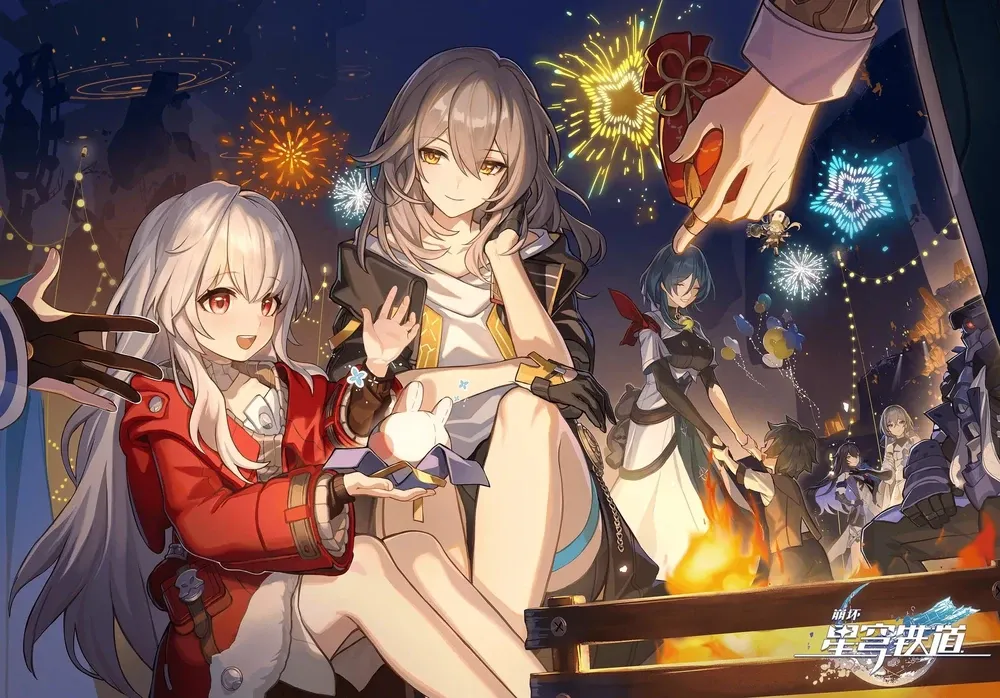
Artist: HoYoverse
Table of Contents
Introduction
Knowing how to construct and play an effective team can make all the difference in Honkai: Star Rail, whether it’s clearing that tough Simulated Universe World you’re stuck on, making a better farming setup for your daily Calyx runs, or just making use of a character you really like! However, it can also be a pretty daunting process. When do you need a healer or shielder? How can I build a team around Herta? Can multi-target units work in single-target fights?
This guide will walk you through the process of making your own teams and give you some easily-accessible examples if you don’t know where else to start. This guide assumes you know the basics of each Path and Element in Star Rail, but if you are unfamiliar with them, you can check out the Beginner Guide, which describes the general roles of each Path and the various mechanics behind Elements.
Path, Element, and When They Matter
Above all else, characters in Star Rail are defined by their Path and Element. In fact, it’s basically required that you swap between different Paths and Elements to meet the challenges of each new battle. However, thinking exclusively in terms of Paths and Elements when putting together new teams is sometimes counterproductive. Seele is a Hunt character, but she often works best in multi-target content. Natasha is an invaluable healer in many teams but she can also contribute with breaking Toughness and generating Skill Points. Asta is a powerful Harmony unit, but one of the biggest reasons to run her is her Skill’s strong single-target Toughness damage. Instead of trying to match up characters directly to content based on their in-game designations, it’s better to view them through the lens of their respective roles.
Character Roles
The currently available characters have been organized into five roles, shown in the table below. Note that some characters appear more than once if they fill more than one role.
Note: The order of characters in the chart below does not convey relative strength.
| Single-Target Damage Dealer These characters have consistent high single-target damage and Toughness breaking. Good against bosses and Elite enemies. |          |
| Multi-Target Damage Dealer These characters specialize in consistent multi-target damage and Toughness breaking. They excel against waves of mobs and bosses that summon other enemies, but can struggle against lone bosses or Elite enemies. |      |
| Buffers These characters buff allies with effects like ATK% and CRIT DMG% increases. They can also provide team utility that is not directly related to damage, like turn control, Energy regeneration, and SPD increases. |    |
| Debuffers These characters debuff enemies with negative effects like DEF reduction, Vulnerability, and damage over time. They usually provide good personal damage alongside their utility. |   |
| Sustain These characters keep their teammates alive through restoring HP or reliable shielding. |    |
| Tanks These characters mitigate damage by granting shields or damage reduction to teammates and influencing enemy aggression in the player’s favor. |   |
Investment Priority
Star Rail is not a game where you can ignore 2-3 of your team’s characters and expect to find success. Once you have a team in mind, there is a baseline level of investment you should put into each character for survivability purposes. After each character on said team reaches a serviceable level, you can start focusing more on specific units to more significantly improve the team’s overall performance. The general recommended order for this investment is as follows:
Single-Target Damage Dealers > Sustain and Tanks > Multi-Target Damage Dealers ≥ Buffers > Debuffers
- Single-Target Damage Dealers
The most challenging content in Star Rail involves high HP bosses and elite enemies, so single-target damage dealers should be your highest investment priority. - Sustain and Tanks
Outside of special environments like the Simulated Universe, it is impossible to completely avoid taking damage in Star Rail, so it is necessary to invest in defensive units. - Multi-Target Damage Dealers
A substantial amount of the game involves mobs of multiple weak enemies, which multi-target damage dealers are most effective at clearing. Although they can struggle as a high damage source in single-target content, they are commonly used to Weakness Break and clear out weaker mobs summoned by bosses/Elite Enemies. On the contrary, dedicated single-target damage dealers can still clear mob content, albeit much slower, so it’s recommended to invest in multi-target only after you build a single-target damage dealer. - Buffers
Buffers can provide a significant boost to your damage dealer’s performance. Most characters benefit unconditionally from offensive stats like ATK%, Damage%, SPD, etc. However, if your damage dealers aren’t already well-invested, buffers won’t contribute much. Multiplying zero by two is still zero. - Debuffers
Debuffers can be just as potent as buffers, but they are less flexible because debuffs can miss or be resisted by enemies. However, debuffers can often act as secondary damage dealers, and the utility they provide is impossible to find elsewhere. As a result, it’s hard to definitively recommend when you should invest in them, but they certainly should not be ignored.
Fundamentals of Teambuilding
- Survivability
You can’t do damage if you’re dead. Since Star Rail is a turn-based game, there is no way to avoid taking damage without the help of special effects from content like Simulated Universe. Generally, every team will need at least one healer or shielder. Unfortunately, there are few dedicated defensive options available right now, so don’t panic if you can’t fully overcome this issue in two-team settings like the Forgotten Hall at the moment. - Damage
Some battles have time limits. In the Forgotten Hall, stages must be completed in a certain number of cycles, and in Simulated Universe battles, enemies will eventually enrage, gaining damage that cannot reasonably be sustained indefinitely. It may seem obvious, but every team needs at least one damage dealer. Teams full of healers and/or shielders will not have enough damage to end fights before you run out of cycles or the enemy enrages. - Skill Point Economy
Skill Points (SP) are a limited resource. Using Skills consumes SP, and using Basic Attacks generates SP1. When building a team, a good place to start is aiming for “SP neutrality;” in other words, the amount of SP the team consumes should be roughly equivalent to the amount of SP it generates. To maintain SP neutrality, the team as a whole should use about the same number of Skills and Basic Attacks over time. It is important to understand the mechanics of every character on your team and how to most effectively manage their Skill and Basic Attack usage.
One effective strategy for ensuring SP neutrality is to look at whole-team turns. Each team has four characters, and each character can either use their Skill or Basic Attack on their turn. If you make sure each team turn is SP neutral, the team will be SP neutral as a whole. This means that on average, you will be able to use two Skills and two Basic Attacks per team turn. Most damage dealers want to use their Skill every turn, so that’s one Skill usage reserved. The other Skill and the two Basic Attacks should then be distributed based on team needs. If the team has a second damage dealer, the other Skill can be used for their turn. If someone needs a heal or shield, the other Skill can be used for this purpose. Using this strategy, you can plan out each turn in advance and ensure you never run out of Skill Points when you need them.
1 There are some exceptions. In version 1.0, several abilities do not follow this rule: Arlan’s Skill does not consume SP (and instead consumes HP), and Qingque’s Enhanced Basic Attack does not generate SP (unless she is at Eidolon 6). There may be other exceptions in the future, but the general rule remains true.
Meaningful Optimizations
Matching Elements to Weaknesses
When planning for a battle, it’s extremely important to take enemy Elemental Weakness into account. All enemies take 10% less damage from all Elements while their Toughness bar is not depleted. On top of this, enemies generally have no resistance to Elements they are Weak to, but 20-40% resistance to other Elements, with a couple exceptions. Furthermore, Breaking enemies delays their actions and can interrupt certain attacks or remove certain buffs, reducing the damage your team takes.
Cheap Investment Weakness Break
The damage characters deal with their abilities is based on many different stats. Past the early stages of the game, a large proportion of those stats come from Relics, which take lots of resources and time to optimize. Increasing this damage will be important in the long run, but it is expensive and time-consuming.
However, increasing Weakness Break damage is much simpler than increasing ability damage, because it is only affected by Character level and the Break Effect stat. Since it is costly to optimize Relic stats on characters, it is generally more efficient in the early game to invest only in Level and Break Effect for units that deal less ability damage and dedicate the more expensive damaging stats to your primary damage dealer.
Additionally, using your damage dealer’s heavy hits to cause Weakness Breaks can potentially lower your team’s overall damage. Enemies have 10% damage reduction while their Toughness bar is unbroken, and this damage reduction also applies to the hit that causes the Weakness Break. For this reason, it can be more effective to cause a Weakness Break with a supporting character before your primary damage dealer uses their abilities, especially if that supporting character is invested in Break Effect. However, doing so is not always possible, especially if your damage dealer acts before your break support. If the enemy is charging up a potent attack and you need to disrupt them, or if delaying the enemy early would produce a more favorable turn order, it is usually better to use your damage dealer’s heavy attacks to Break the enemy instead.
Party Positioning
Characters of certain Paths are more likely to be targeted by enemies than others. We call this likelihood “aggro.” The order of character aggro by Path is as follows:
- Preservation (6)
- Destruction (5)
- Harmony / Nihility / Abundance (4)
- Erudition / The Hunt (3)
We can see that Preservation units have higher aggro than units of other Paths. Some Preservation units even have ‘Taunt’ Skills that can further increase their aggro by increasing the chance that enemies target them. Since Preservation units often have damage reduction and build more DEF than other units, they also take less damage from enemy attacks, so they serve well as tanks.
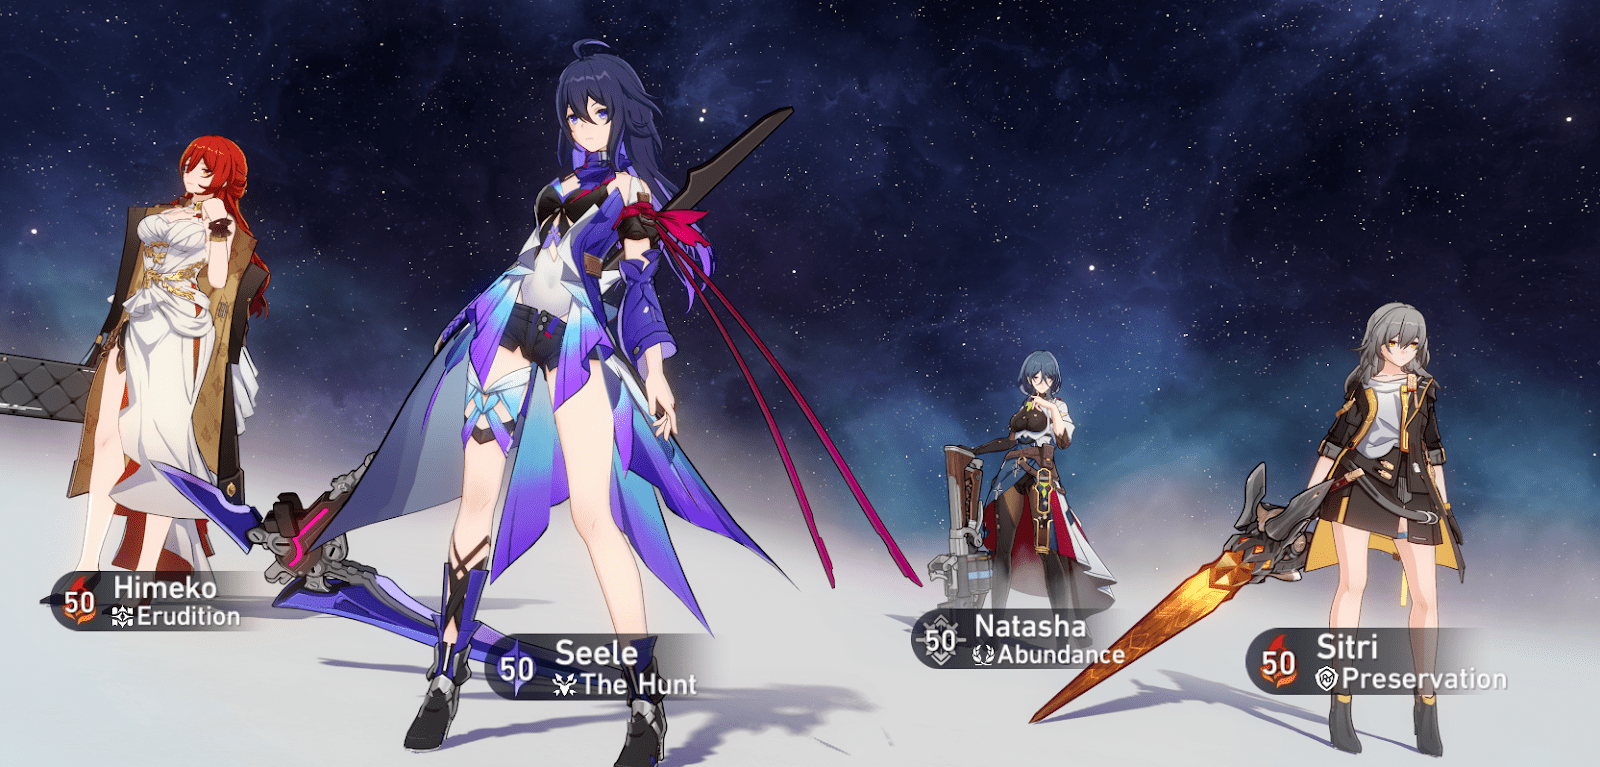
Some enemy attacks can also damage characters adjacent to the primary target. You want to place higher aggro characters in team slot 1 or 4 of your team (the leftmost and rightmost slots) to reduce the amount of AoE damage your team takes. Next to them, you want to put a high HP or DEF character. With this setup, more often than not, the characters getting hit most are the two characters with the highest survivability on the team, and the squishier damage dealers and supports remain safe.
In the picture below, Fire Trailblazer (who has the highest aggro in the team) sits on the right end with the HP-scaling healer Natasha on her left, with Seele and Himeko further away from potential danger.
There are caveats to this. Sometimes, when you want your damage dealers to gain extra Energy, you can put them next to a high aggro unit to regain some Energy when hit by multi-target attacks. The Energy gain depends on the enemy attack, but in most cases you can expect between 5-20 Energy per attack.
However, this should only be done when your damage dealers are tanky enough for the content and you really need the Energy. Characters belonging to the Hunt Path typically generate enough Energy on their own, but Destruction characters less so, which makes this strategy more appealing for them.
The SPD stat
SPD (Speed) affects how often characters are able to act in battle. Understanding Speed and turn order mechanics is critical to constructing a synergistic team and playing it optimally. Since Speed is a complex topic that cannot be explained in a few paragraphs, KQM has written an entire guide about Speed and turn order. We recommend you read it to gain a deeper understanding of the game, as it will help you in the long run.
Read the Speed Guide here: Speed Guide
Team Types and Templates
Our suggestions will refer to each character slot by the groups indexed earlier in the “Roles” section. The landscape may change as more characters are released, but the most common team archetypes are included below. This is not an exhaustive list, but rather some general suggestions to get you started.
Hypercarry Teams
| Single-Target Damage Dealer | Buffer / Debuffer | Sustain | Flex Slot |
  |   |   |  |
These teams excel at boss fights with few mobs and are a staple for tackling harder content. However, for general farming use, their clear speed is fairly slow compared to a multi-target focused team. This is a heavily recommended team comp for all players whose focus is clearing content.
Some examples of hypercarry teams follow. Do note that these are not the only teams you can build – get creative!
Seele Hypercarry
| Single-Target Damage Dealer | Buffer (see notes below) | Sustain | Flex (see notes below) |
 |  |  |
Buffers: Asta, Tingyun, and Bronya can all provide Seele extra actions either directly or indirectly. When used at the right time in conjunction with the action delay from Weakness Break, Asta’s SPD buff on her Ultimate can help Seele lap opponents. Tingyun’s Ultimate grants 50 Energy to an ally, which allows Seele to cast more Ultimates, and Bronya can use her Skill to advance Seele’s turn forward and get Seele’s Resurgence going.
Flex Slot: Natasha and Fire Trailblazer are a fantastic and accessible defensive core for any hypercarry when paired together. Natasha can use her Ultimate to heal back damage that breaks through the Fire Trailblazer’s small team shield. Any combination of a healer plus a shielder works well. Players can also use any debuffer or a second buffer in the flex slot over a shielder if survivability is not an issue. Adding these options for Weakness Break coverage and additional damage can also weaken the enemy for Seele to finish off and activate her Resurgence.
Clara Hypercarry
| Clara | March 7th | Sustain | Buffer / Debuffer (see notes below) |
 | |
Clara is a unique damage dealer due to her Counter mechanics. She has stellar synergy with March 7th’s shield, which can mitigate damage, remove a debuff, and increase the likelihood that enemies target Clara. Svarog will counterattack and apply Marks of Counter onto enemies that hit Clara, and Marks of Counter are consumed to deal additional Physical DMG when Clara uses her Skill.
Flex Slot: Since this is a hypercarry team, the flex spot is best used for a buffer or debuffer. Tingyun can buff Clara’s damage and provide her with extra Energy; Pela can debuff enemies so they take more damage and remove enemy buffs so they deal less damage to Clara. Note that, while certainly viable in this slot, Bronya is less optimal than Tingyun or Pela because Clara teams do not get much value from the turn control Bronya provides with her Skill.
Hypercarry with Accessible Units
| Single-Target Damage Dealer | Buffer / Debuffer | Sustain | Flex |
Dan Heng should not be underestimated just because he’s a free character. He can deal impressive damage, especially with proper use of his Talent, which increases his Wind RES PEN for his next attack after being targeted by an ally’s Skill. When Dan Heng has his Ultimate available, use his Skill to Slow the target, and then target Dan Heng with an ally’s ability just before using his Ultimate. Make sure you pay attention to his Talent’s cooldown to avoid unleashing his Ultimate without it being active.
Other characters can support Dan Heng with buffs or debuffs, healing, and shields. Both Tingyun’s Skill and Ultimate can target Dan Heng to activate his Talent, while giving him a sizable buff at the same time. If Pela is being used to debuff the enemy, Natasha and March 7th can trigger Dan Heng’s Talent instead. Any other buffers or debuffers that synergize with Dan Heng’s kit can be used here as well.
Multi-Carry Teams
| Single-Target Damage Dealer | Multi-Target Damage Dealer | Sustain | Flex Slot |
|  | | |
These teams are good for fights with a mix of single-target and multi-target damage, like multi-wave fights or bosses that repeatedly summon additional mobs. These teams can also be good open-world exploration teams due to their flexibility.
Note: In most cases, you can fairly easily turn a hypercarry team into a multi-carry team by substituting a multi-target damage dealer in for the buffer / debuffer slot.
Here are some examples of multi-carry teams.
Multi-carry with Accessible Units
| Single-Target Damage Dealer | Multi-Target Damage Dealer | Sustain | Flex |
Note that this team is quite similar to the “Hypercarry with Accessible Units” team. Here, we replace the buffer/debuffer slot with Serval, a flexible multi-target damage dealer that can run mostly SP-neutral. Alternate between Serval’s Skill and Basic Attack every turn, to maintain SP neutrality and keep the Shocked status on enemies, and play the rest of the team largely the same as you would play the hypercarry team.
Stall Teams
| Single-Target Damage Dealer | Sustain | Tank | 2nd Sustain / Tank |
| | | |
Stall teams are designed to deal with content that you are severely underleveled for or content where you have little way of dealing with one-shot mechanics. They lack damage, clear speed, and general flexibility, and thus are not recommended for general use. This is especially relevant for the Forgotten Hall due to the cycle limit. However, in Simulated Universe, simply staying alive to let the Path Resonances deal damage is sometimes a valid strategy.
One thing to note is that in Simulated Universe, some enemies have “enrage timers” where if you take too long to kill them, they deal significantly increased damage and no amount of shielding and healing can stop you from eventually losing the battle of attrition.
An example:
Stall with Accessible Units
| Damage Dealer | Sustain | Tank | 2nd Tank |
No gacha required! You might notice that this team is quite similar to the “Hypercarry with Accessible Units” example in the Hypercarry section. Dan Heng is an example of a character with consistent single-target damage, and surrounding him with characters that provide survivability can extend the battle while you chip away at the enemy’s health bar.
You can adjust this team to work with any single-target damage dealer, tank, or sustain unit that you obtain from gacha. Make sure to have at least one healer to restore any damage that slips past shields.
Farming Teams
| Multi-Target Damage Dealer | Buffer / Debuffer | Sustain / Tank | Single-Target Damage Dealer |
| | | |
Farming teams always include a multi-target damage dealer to handle waves of mob content. Farming content such as Calyxes (Trace and EXP Materials) is usually fairly easy, so you want to prioritize fast clears over maximum survivability. Because we’ve placed single-target damage dealers at the top of our investment priority list, we recommend using a single-target damage dealer in the final slot for resource efficiency instead of building a second multi-target damage dealer. Single-target damage dealers can reliably clean up any leftover enemies that your multi-target damage can’t clear out. One defensive option is still recommended, just to mitigate bad luck with auto-battle and prevent you from dying mid-stage.
Some examples:
Farming with Accessible Units
| Multi-Target Damage Dealer | Buffer / Debuffer | Sustain / Tank | Single-Target Damage Dealer |
 |
A standard farming setup with very flexible options. Free damage units are used as an example but any character outlined in the index in the “Roles” section works for their respective slots. These teams are not always meant to tackle difficult content, so try out different combinations to your heart’s content.
Farming with Himeko
| Multi-Target Damage Dealer | Buffer / Debuffer | Sustain / Tank | Single-Target Damage Dealer |
 | |
Himeko is an outstanding farming character, providing a multi-target follow-up attack with her Talent Victory Rush. Additionally, the Burn DoT applied by her A2 bonus Talent can be useful for finishing off low HP enemies. Teams around Himeko excel with investment into your Toughness breakers but more or less look the same as the previous example.
Sushang is a single-target damage dealer that complements Himeko. Sushang can combo a Skill into her Ultimate, which advances her action forward by 100% and gives her another opportunity to use her Skill for Weakness Breaks to grant Himeko a Victory Rush charge.
Asta is another complementary character to consider for Himeko’s buffer / debuffer slot due to a Fire DMG% Boost on her A4 bonus Talent, as well as strong Weakness Break capabilities on her Skill. Players can opt for debuffers like Welt (who increases the damage received by targets with his A2 Trace) or Pela (who reduces enemy DEF with her Ultimate). Using non-Fire options can also help with Element diversity.
Farming with Seele
| Seele | Buffer | Debuffer or 2nd Buffer | Sustain / Tank |
|
This is a similar Seele team to the one in the Hypercarry section. Seele’s Talent Resurgence can provide an extra action when she kills enemies, allowing her to reliably clear waves of mobs.
Credits
Written by jas#6562, Meowreii (Meow#0217), NeirodTheSeal#2104, Sitri, and skylarke#0001
Edited by Cyn, fourmana, and Sushou
Transcribed by Nyte