

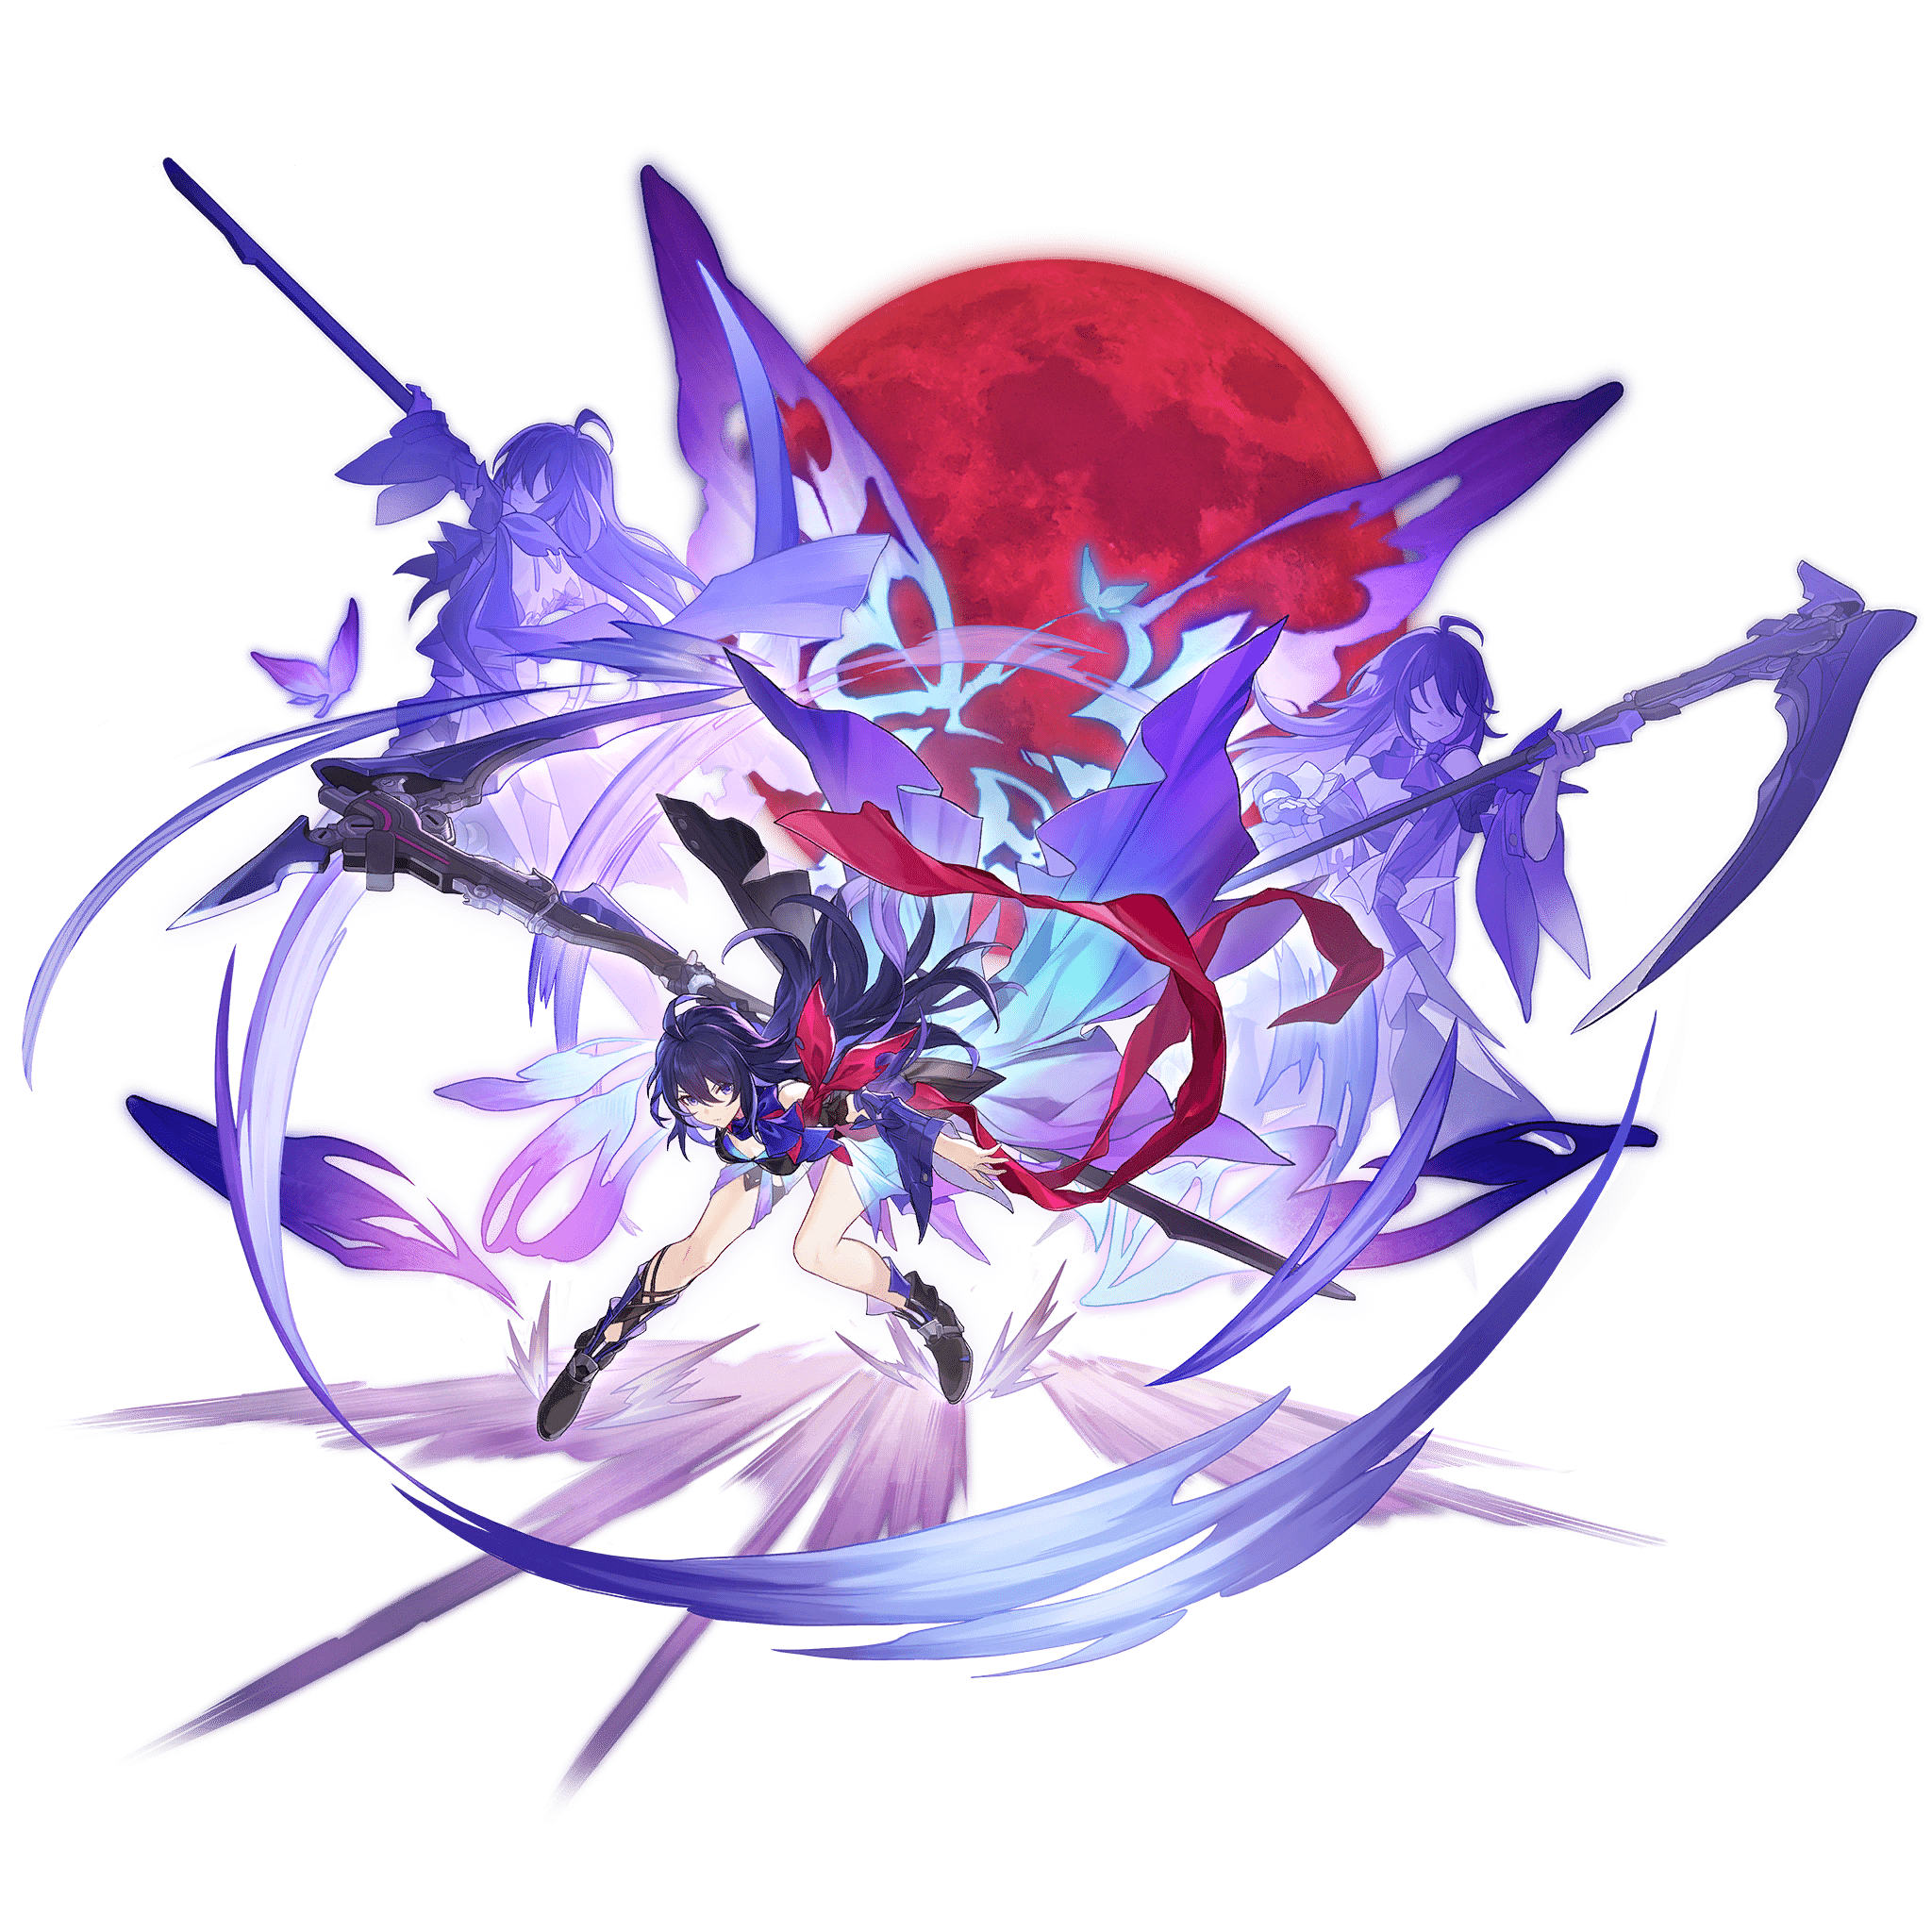
Artist: HoYoverse
This guide takes a brief look at the Honkai: Star Rail 5★ characters available as of Version 1.1, and gives some basic advice as to their playstyles, Light Cones, Relics, and teammates.
Note that the information is subject to change; more extensive testing is in progress. Join our Discord to check out and participate in the theorycrafting process.

Luocha

Silver Wolf

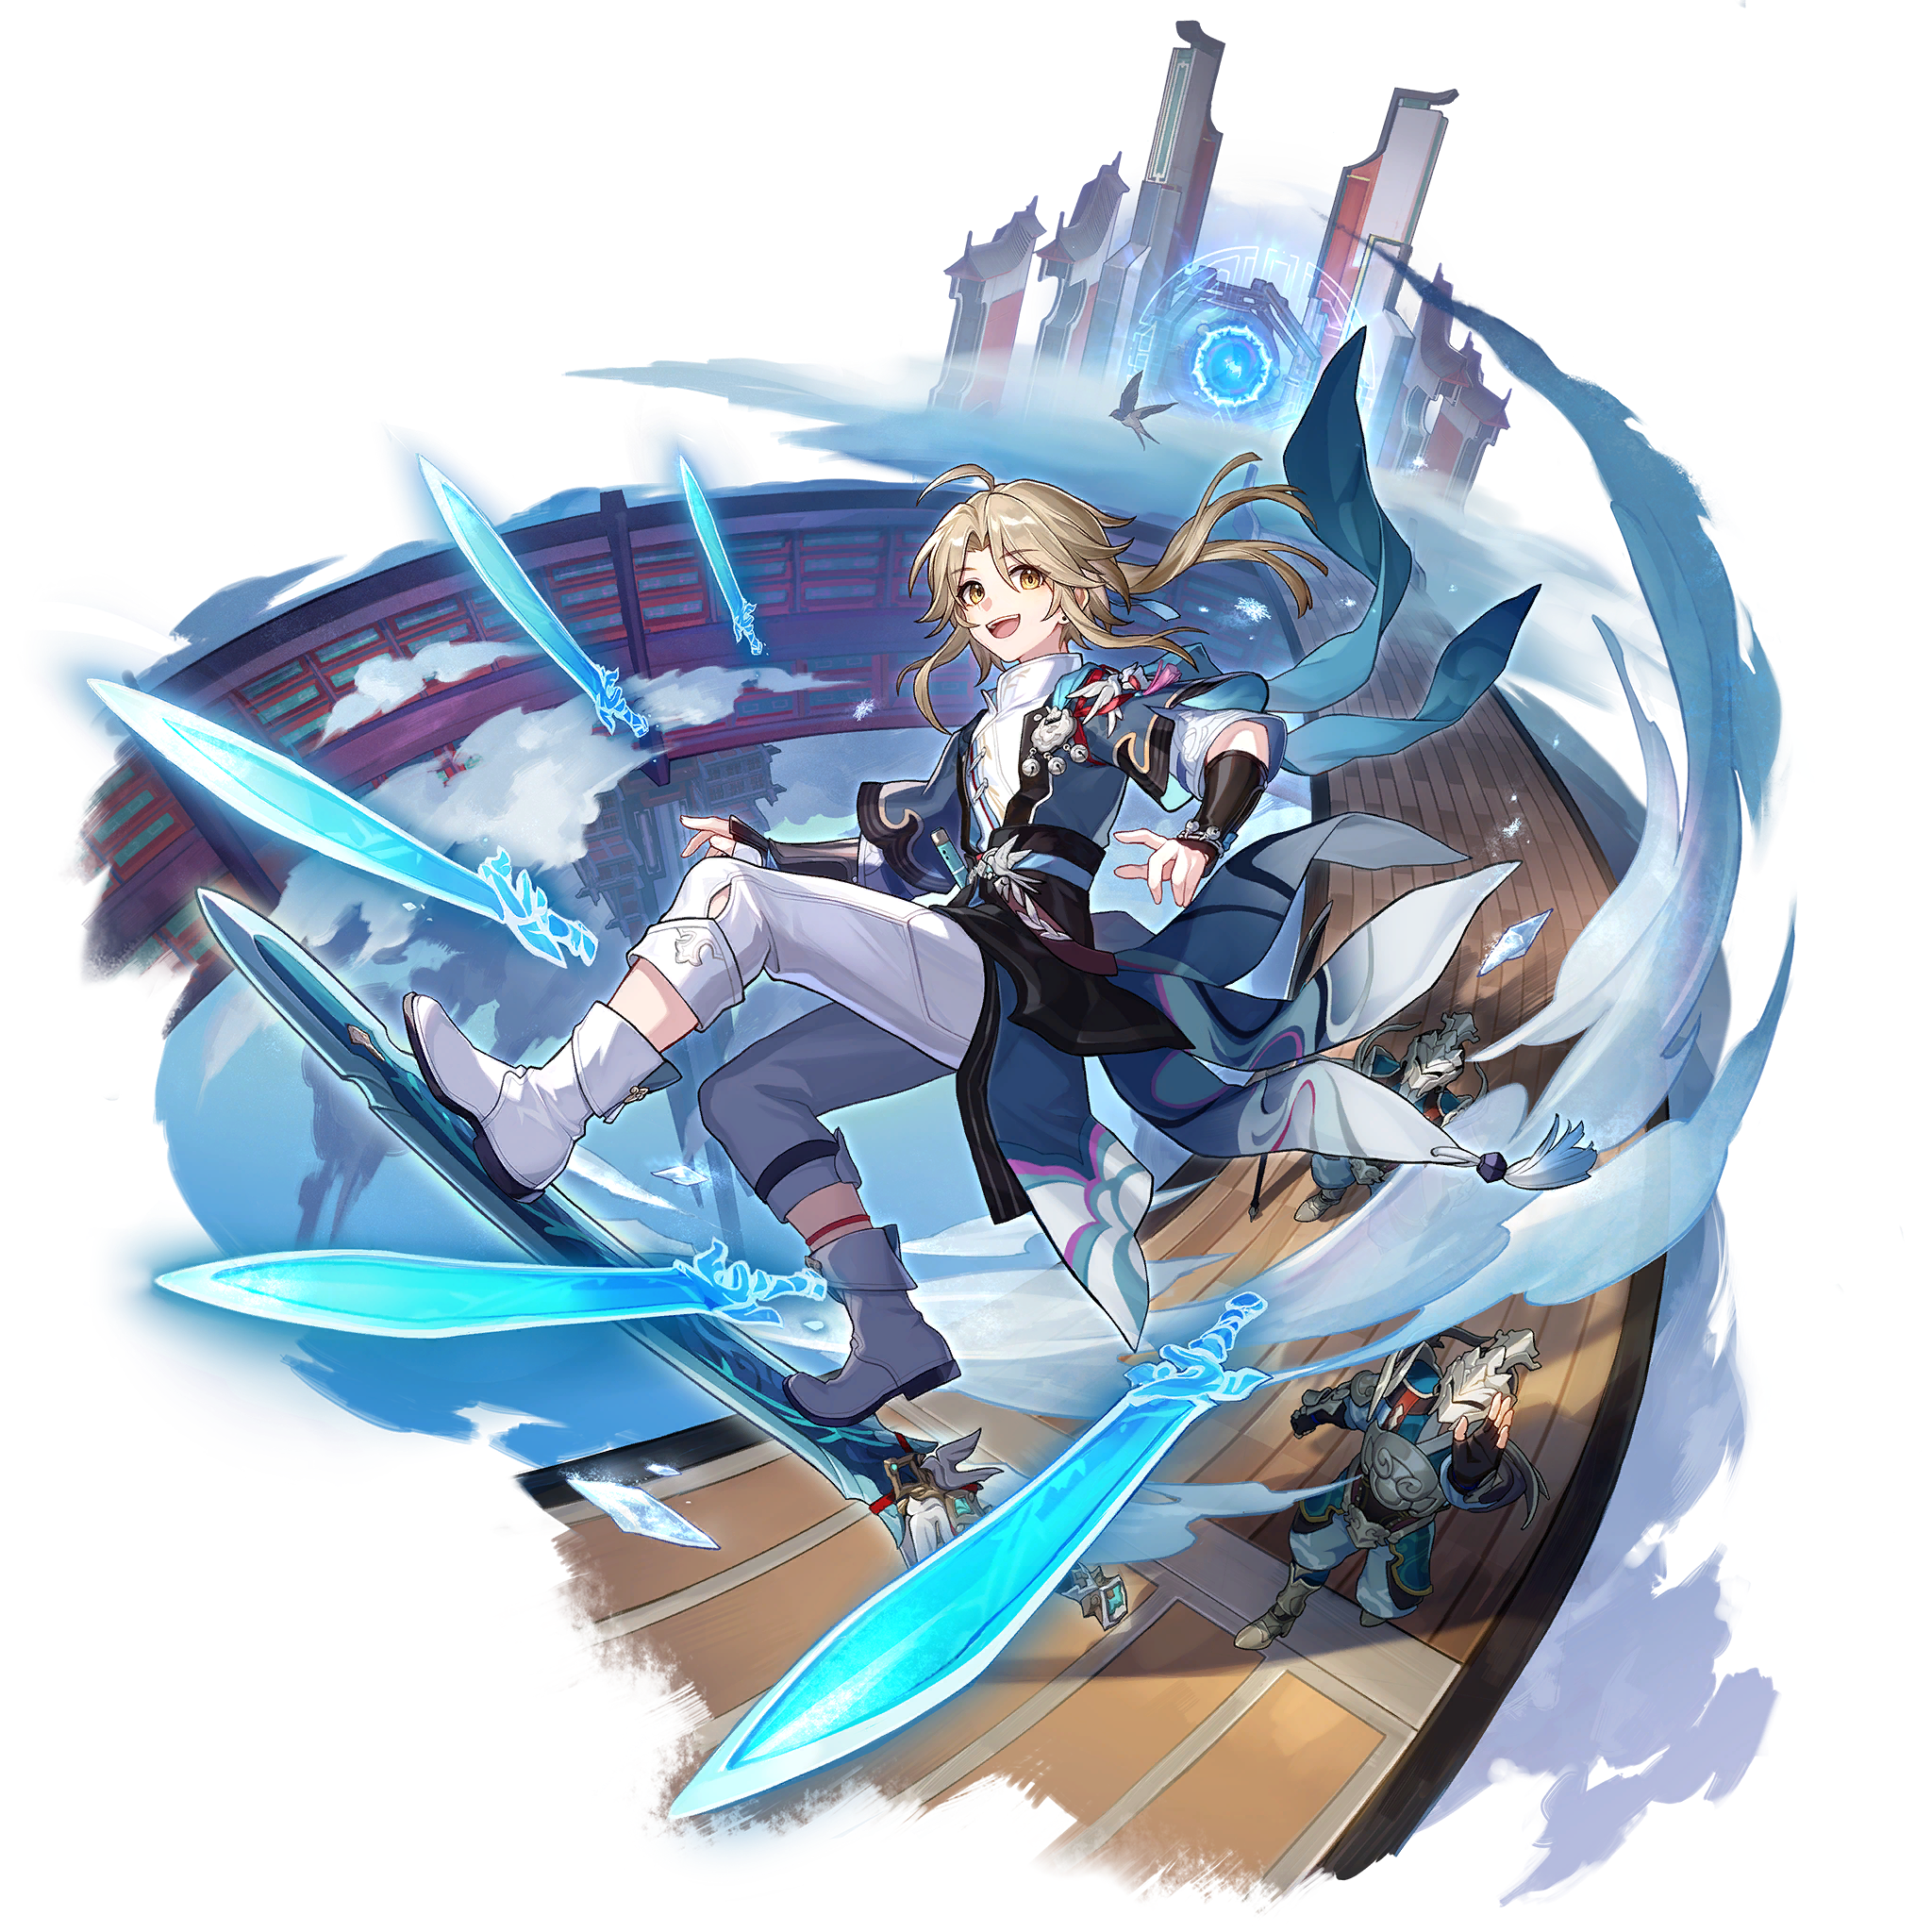
Jing Yuan
Seele

Fire TB

Physical TB
Bronya

Clara

Welt

Yanqing
Himeko
Bailu

Gepard
Table of Contents
Luocha

Luocha is a 5★ character available exclusively from the Laic Pursuit Warp in Honkai: Star Rail. He deals Imaginary damage and belongs to the Abundance Path.
 | Imaginary provides strong crowd control. When an enemy is Weakness Broken by Imaginary DMG, the enemy is pushed down in the turn order (even more than when broken by Quantum) and inflicted with Imprisonment, which reduces the enemy’s Speed stat as well as further delaying their action. |
 | Path of Abundance: These characters heal allies and restore HP to the team. |
How to Play
Luocha is a sustain unit that supports his team through healing, cleansing ally debuffs, and dispelling enemy buffs.
Luocha provides healing through his Skill and Talent, with the latter automatically healing any ally that falls below 50% HP. His Talent is triggered when Luocha possesses two Abyss Flower stacks and operates on a 2 turn cycle, meaning that maintaining uptime is essential to consistent healing. Both healing from Skill and Talent will cleanse the ally.
His Ultimate inflicts Imaginary damage on all enemies while removing one buff from them. This, coupled with Luocha’s constant Basic ATK usage, allows him to quickly melt through the Toughness bar of Imaginary-weak enemies.
He consolidates Imaginary Break, healing, cleansing, and buff removal, all while being generally SP positive.
Light Cones
 | Echoes of the Coffin is Luocha’s signature 5★ Light Cone and is exclusive to the Brilliant Fixation Warp. Light Cone Ability: Thorns Increases the wearer’s ATK by 24%. After the wearer uses an attack, for each different enemy target the wearer hits, regenerates 3.0 Energy. Each attack can regenerate Energy up to 3 time(s) this way. After the wearer uses their Ultimate, all allies gain 12 SPD for 1 turn. |
 | Post-Op Conversation is a Warp exclusive 4★ Light Cone. Light Cone Ability: Mutual Healing Increases the wearer’s Energy Regeneration Rate by 8% and increases Outgoing Healing when they use their Ultimate by 12%. |
 | Shared Feeling is a Warp exclusive 4★ Light Cone. Light Cone Ability: Cure and Repair Increases the wearer’s Outgoing Healing by 10%. When using Skill, regenerates 2 Energy for all allies. |
 | Quid Pro Quo is a 4★ Light Cone that can be obtained from the weekly Echoes of War or purchased from the Light Cone Manifest from the Messenger in the Parlor Car. Light Cone Ability: Enjoy with Rapture At the start of the wearer’s turn, regenerates 8 Energy for a randomly chosen ally (excluding the wearer) whose current Energy is lower than 50%. |
 | Warmth Shortens Cold Nights is a Nameless Honor exclusive 4★ Light Cone. Light Cone Ability: Tiny Light Increases the wearer’s Max HP by 16%. When using Basic ATK or Skill, restores all allies’ HP by an amount equal to 2.0% of their respective Max HP. |
 | Multiplication is a Warp exclusive 3★ Light Cone. Light Cone Ability: Denizens of Abundance After the wearer uses their Basic ATK, their next action will be Advanced Forward by 12%. |
Relics
In the early game, gearing with specific Relics and Planar Ornament sets is not necessary to progress. KQM will update this section as soon as we are able to confidently offer accurate rankings and evaluations.
Luocha appreciates having the SPD from the Musketeer of Wild Wheat set to cycle through his Talent’s 2 turn restriction faster. Alternatively, the added starting SP and bonus healing from the Passerby of Wandering Cloud is appreciated in certain teams.
Fleet of the Ageless gives the entire party ATK% and is recommended as a general support option.
Relic
 | Musketeer of Wild Wheat is a Relic set located in Jarilo-VI: Corridor of Fading Echoes. It can also be obtained in Echoes of War and by spending Hertareum at the Internal Purchase Officer in Herta Space Station: Master Control Zone. Relic Set Effect: 2pc: ATK increases by 12%. 4pc: The wearer’s SPD increases by 6% and Basic ATK DMG increases by 10%. |
 | Passerby of Wandering Cloud is a Relic set located in Jarilo-VI: Corridor of Fading Echoes. It can also be obtained when Trailblazers reach level 26–27 and by completing Operation Briefing (Part 3). Relic Set Effect: 2pc: Increases Outgoing Healing by 10%. 4pc: At the start of the battle, immediately regenerates 1 Skill Point. |
Planar Ornaments
 | Fleet of the Ageless is a Planar Ornament set located in Simulated Universe: World 3. Planar Ornament Set Effect: 2pc: Increases the wearer’s Max HP by 12%. When the wearer’s SPD reaches 120 or higher, all allies’ ATK increases by 8%. |
Teambuilding
Luocha has general synergy with almost all damage dealers by providing healing, cleansing, and dispelling. He is a very versatile option and can generally slot into most teams without an issue due to his undemanding playstyle.
Silver Wolf

Silver Wolf is a 5★ character available exclusively from the Contract Zero Warp in Honkai: Star Rail. She deals Quantum damage and belongs to the Nihility Path.
 | Quantum provides a mix of crowd control and a very low amount of damage upon Weakness Break. When an enemy is Weakness Broken by Quantum DMG, they are inflicted with Entanglement, which pushes them down in the turn order and lasts until the enemy’s next turn. When the Entanglement effect expires it inflicts damage once. This damage increases when the enemy is hit before its turn. |
 | Path of Nihility: These characters apply debuffs to enemies that reduce their combat capabilities. |
How to Play
Silver Wolf is a support unit that focuses on decreasing the DEF of enemies with her Talent and Ultimate, and implants Elemental Weaknesses and decreases Elemental RES with her Skill. She is a highly flexible support unit who increases the overall damage and Toughness breaking of a team.
Silver Wolf’s Ultimate is one of the focal points of her kit, dealing high Quantum damage to a single enemy while also decreasing their DEF, and scales with the level of her Ultimate.
Silver Wolf’s main value comes from being highly flexible, as her Weakness implant allows for her to be run in various teams with damage dealers of different Elements, without necessarily having to bring damage dealers of the correct Element. Additionally, decreasing the DEF of enemies will increase the damage of any damage dealer.
In battle, Silver Wolf often wants to use her skill on the Boss or Elite enemy in order to get a favorable Weakness implant, and then primarily use her Basic ATK to help generate SP for the team. Use her Ultimate to increase team damage against a particular target, typically an Elite or Boss enemy.
Light Cones
In the early game, gearing with specific Light Cones and Relics is not necessary to progress. KQM will update this section as soon as we are able to confidently offer accurate rankings and evaluations.
 | Incessant Rain is Silver Wolf’s signature 5★ Light Cone and is exclusive to the Brilliant Fixation Warp. Light Cone Ability: Mirage of Reality Increases the wearer’s Effect Hit Rate by 24%. When the wearer deals DMG to an enemy that currently has 3 or more debuffs, increases the wearer’s CRIT Rate by 12%. After the wearer uses their Basic ATK, Skill, or Ultimate, there is a 100% base chance to implant Aether Code on a random hit target that does not yet have it. Targets with Aether Code receive 12% increased DMG for 1 turn. |
 | Before The Tutorial Mission Starts is an Event exclusive 4★ Light Cone. Light Cone Ability: Quick on the Draw Increases the wearer’s Effect Hit Rate by 20%. When the wearer attacks DEF-reduced enemies, regenerates 4 Energy. |
 | Resolution Shines As Pearls of Sweat is a Warp exclusive 4★ Light Cone. Light Cone Ability: Glance Back When the wearer hits an enemy and if the hit enemy is not already Ensnared, then there is a 60% base chance to Ensnare the hit enemy. Ensnared enemies’ DEF decreases by 12% for 1 turn(s). |
Relics
In the early game, gearing with specific Relics and Planar Ornament sets is not necessary to progress. KQM will update this section as soon as we are able to confidently offer accurate rankings and evaluations.
Silver Wolf appreciates the SPD from the 4pc Musketeer of Wild Wheat set, helping her to gain more turns over the course of a battle. She can use the 4pc Genius of Brilliant Stars to instead improve her own personal damage.
Pan-Cosmic Commercial Enterprise can be used to help Silver Wolf reach enough EHR to guarantee that her debuffs will land, while Sprightly Vonwacq can be used to have Silver Wolf implant Weaknesses early in a fight.
Relic
 | Genius of Brilliant Stars is a Relic set located in Jarilo-VI: Everwinter Hill. Relic Set Effect: 2pc: Increases Quantum DMG by 10%. 4pc: When the wearer deals DMG to the target enemy, ignores 10% DEF. If the target enemy has Quantum Weakness, the wearer additionally ignores 10% DEF. |
| Musketeer of Wild Wheat is a Relic set located in Jarilo-VI: Corridor of Fading Echoes. It can also be obtained in Echoes of War and by spending Hertareum at the Internal Purchase Officer in Herta Space Station: Master Control Zone. Relic Set Effect: 2pc: ATK increases by 12%. 4pc: The wearer’s SPD increases by 6% and Basic ATK DMG increases by 10%. |
Planar Ornaments
 | Pan-Cosmic Commercial Enterprise is a Planar Ornament set located in Simulated Universe: World 5. Planar Ornament Set Effect: 2pc: Increases the wearer’s Effect Hit Rate by 10%. Meanwhile, the wearer’s ATK increases by an amount that is equal to 25% of the current Effect Hit Rate, up to a maximum of 25%. |
 | Sprightly Vonwacq is a Planar Ornament set located in Simulated Universe: World 4. Planar Ornament Set Effect: 2pc: Increases the wearer’s Energy Regeneration Rate by 5%. When the wearer’s SPD reaches 120 or higher, the wearer’s action is Advanced Forward by 40% immediately upon entering battle. |
Teambuilding
Silver Wolf is a highly flexible support that can be used in almost any team. She works well in teams with SP intensive units, due to infrequent usage of her Skill.
Silver Wolf can notably be used to enable Mono Element teams. These teams focus on pairing 3 characters of the same Element with Silver Wolf to ensure Weakness implanting which leads to more consistent Breaks. While this approach is not currently optimal, it is a viable option if you want to force a specific unit, or if you are lacking in Elemental coverage with the damage dealers on your account.
Jing Yuan

Jing Yuan is a 5★ character available exclusively from the Swirl of Heavenly Spear Warp in Honkai: Star Rail. He deals Lightning damage and belongs to the Erudition Path.
 | Lightning is a damage-oriented Element that does a low amount of damage upon Weakness Break. The Shock effect lasts for two turns and does one instance of Lightning damage per turn. It is not affected by enemy type. |
 | Path of Erudition: These characters focus on high multi-target damage. They function best as the main damage dealer against groups of enemies. |
How to Play
Jing Yuan is an Erudition Path Lightning character who provides large amounts of damage in both single-target and multi-target scenarios.
Jing Yuan’s signature feature is his Talent, which adds the Lightning-Lord to the Action Order with 3 Hits Per Action. Jing Yuan’s Skill and Ultimate increase the Lightning-Lord’s Hits Per Action, up to a maximum of 10. This will also increase the Lightning-Lord’s Speed, bringing its turn closer. Whenever it is the Lightning-Lord’s turn, it will unleash a number of attacks equal to its Hits Per Action. These attacks use Jing Yuan’s ATK and DMG% and count as Follow-up attacks. The Lightning-Lord attacks random enemies and also damages neighboring enemies. If there is only one enemy, then every attack will be aimed at that enemy. Once its turn is over, the Lightning-Lord goes back to 3 Hits Per Action and waits for its next turn.
Jing Yuan’s Skill damages all enemies and increases the Lightning-Lord’s Hits Per Action by 2. His Ultimate also damages all enemies, and increases its Hits Per Action by 3. His Technique causes the Lightning-Lord to start with 2 extra Hits Per Action in the next battle. Jing Yuan’s Basic ATK damages a single enemy, but doesn’t provide any Hits Per Action. His Traces increase his CRIT Rate whenever he uses his Skill, and gives the Lightning-Lord extra CRIT DMG whenever it has at least 6 Hits Per Action.
In battle, Jing Yuan should typically use his Skill and Ultimate as often as he can. That way, the Lightning-Lord will act quickly and do large amounts of damage.
Light Cones
In the early game, gearing with specific Light Cones and Relics is not necessary to progress. KQM will update this section as soon as we are able to confidently offer accurate rankings and evaluations.
 | Before Dawn is Jing Yuan’s signature 5★ Light Cone and can be obtained from the Light Cone Event Warp. Light Cone Ability: Long Night Increases the wearer’s CRIT DMG by 36%. Increases the wearer’s Skill and Ultimate DMG by 18%. After the wearer uses their Skill or Ultimate, they gain Somnus Corpus. Upon triggering a follow-up attack, Somnus Corpus will be consumed and the follow-up attack DMG increases by 48%. |
 | Night on the Milky Way is Himeko’s signature 5★ Light Cone and can be obtained from the Stellar Warp, as a non-rate up on the Light Cone Event Warp, or in the Starlight Exchange for 600 Starlight. Light Cone Ability: Meteor Swarm For every enemy on the field, increases the wearer’s ATK by 9.0%, up to 5 stacks. When an enemy is inflicted with Weakness Break, the DMG dealt by the wearer increases by 30% for 1 turn. |
 | The Birth of The Self is a Warp exclusive 4★ Light Cone. Light Cone Ability: The Maiden in the Painting Increases DMG dealt by the wearer’s follow-up attacks by 24%. If the current HP of the target enemy is below or equal to 50%, increases DMG dealt by follow-up attacks by an extra 24%. |
 | Today is Another Peaceful Day is a Nameless Honor exclusive 4★ Light Cone. Light Cone Ability: A Storm is Coming After entering battle, increases the wearer’s DMG based on their max energy. Damage increases by 0.20% per point of Energy, up to 160 Energy. |
 | The Seriousness of Breakfast is a 4★ Light Cone that can be obtained from the weekly Echoes of War or purchased from the Light Cone Manifest from the Messenger in the Parlor Car. Light Cone Ability: Get Ready Increases the wearer’s DMG by 12%. For every defeated enemy, the wearer’s ATK increases by 4%, stacking up to 3 time(s). |
Relics
In the early game, gearing with specific Relics and Planar Ornament sets is not necessary to progress. KQM will update this section as soon as we are able to confidently offer accurate rankings and evaluations.
Jing Yuan appreciates the Lightning DMG% and ATK% from the Band of Sizzling Thunder set.
Inert Salsotto increases Jing Yuan’s CRIT Rate. With at least 50% CRIT Rate, it will also give extra DMG% to his Ultimate and to the Lightning-Lord’s attacks.
Relic
 | Band of Sizzling Thunder is a Relic set located in Xianzhou Luofu: Cloudford. Relic Set Effect: 2pc: Increases Lightning DMG by 10%. 4pc: When the wearer uses their Skill, increases the wearer’s ATK by 20% for 1 turn(s). |
Planar Ornaments
 | Inert Salsotto is a Planar Ornament set located in Simulated Universe: World 6. Planar Ornament Set Effect: 2pc: Increases the wearer’s CRIT Rate by 8%. When the wearer’s current CRIT Rate reaches 50% or higher, the wearer’s Ultimate and follow-up attack DMG increases by 15%. |
Teambuilding
Jing Yuan acts as a potent damage dealer for a team and wants to be paired with supports who increase the damage he deals.
| Tingyun provides an ATK bonus with her Skill, as well as a DMG% buff on her Ultimate. Additionally, she can generate 50 Energy for a teammate with her Ultimate. This allows Jing Yuan to use his Ultimate more often. | |
| Bronya’s Ultimate provides ATK and CRIT DMG buffs for her team. Her Skill can also be used to give Jing Yuan more turns, meaning more Hits Per Action on the Lightning-Lord. | |
| Pela provides AoE enemy DEF reduction through her Ultimate, as well as the ability to remove one buff from an enemy through her Skill. | |
| Silver Wolf can provide a large variety of debuffs to an enemy, most notably including a DEF reduction from her Ultimate. Her Skill’s Weakness implant can also greatly increase Jing Yuan’s damage against an enemy who normally isn’t weak to Lightning. |
Seele
Seele is a 5★ character available exclusively from the Butterfly on Swordtip Warp in Honkai: Star Rail. She deals Quantum damage and belongs to the Hunt.
| Quantum provides a mix of crowd control and a very low amount of damage upon Weakness Break. When an enemy is Weakness Broken by Quantum DMG, they are inflicted with Entanglement, which pushes them down in the turn order and lasts until the enemy’s next turn. When the Entanglement effect expires it inflicts damage once. This damage increases when the enemy is hit before its turn. |
 | Path of The Hunt: These characters focus on high single-target damage. They function best as the main damage dealer against Boss and Elite enemies. |
How to Play
Seele deals high single-target Quantum damage and excels in situations where she has multiple targets to switch between. Despite being part of the Hunt Path, she functions best in AoE content that contains a primary tanky target with more squishy summons/mobs. In pure ST content, she loses her ability to utilize her on-kill resets.
Her playstyle and kit revolves around her Talent, which grants her an additional action as well as a DMG% buff upon killing an enemy. Her Skill gives her a Speed steroid on use, allowing her to take action more frequently. Upon using her Ultimate, Seele automatically gains her Talent DMG% buff and deals a high amount of damage to a single target. The extra action granted by Ultimate kills is separate from her Skill/Basic ATK, meaning that she can stack up to 2 additional actions per turn.
When she gains an additional action, it prevents you from immediately using Ultimates (both Seele’s and her allies) until after her additional action, so make sure you queue any Ultimates you want to use during the animation of the attack that would defeat the enemy and trigger her Talent.
It is also worth noting that any buffs that last for a set number of turns will not lose a turn when Seele takes additional actions. That is to say, as long as Seele is taking a continuous string of actions, she will not lose any external buffs that specify specific turn durations.
Seele’s Technique allows her to enter stealth for 20 seconds, avoiding detection from enemies.
When she engages an enemy from her stealthed state, Seele immediately starts her turn in her Talent buffed state, making it an excellent way to start off a battle.
Light Cones
In the early game, gearing with specific Light Cones and Relics is not necessary to progress. KQM will update this section as soon as we are able to confidently offer accurate rankings and evaluations.
 | In The Night is a 5★ Light Cone that is Seele’s signature Light Cone and can be obtained on the Light Cone Event Warp. Light Cone Ability: Flowers and Butterflies Increases the wearer’s CRIT Rate by 18%. While the wearer is in battle, for every 10 SPD that exceeds 100, the DMG of the wearer’s Basic ATK and Skill is increased by 6% and the CRIT DMG of their Ultimate is increased by 12%. This effect can stack up to 6 time(s). |
 | Cruising in the Stellar Sea is a 5★ Light Cone that can be purchased in the Simulated Universe Store for 8 Herta Bonds. You can purchase it after clearing Simulated Universe World 4 after Trailblazer Level 30. You can also purchase Superimpositions. Light Cone Ability: Chase Increases the wearer’s CRIT Rate by 8%, and increases their CRIT Rate against enemies with HP less than or equal to 50% by an extra 8%. When the wearer defeats an enemy, their ATK is increased by 20% for 2 turn(s). |
 | River Flows in Spring is a 4★ Light Cone that can be obtained from the weekly Echoes of War or purchased from the Light Cone Manifest from the Messenger in the Parlor Car. Light Cone Ability: Stave Off the Lingering Cold After entering battle, increase the wearer’s SPD by 8% and DMG by 12%. When the wearer takes DMG, this effect will disappear. This effect will resume after the end of the wearer’s next turn. |
 | Return to Darkness is a Nameless Honor exclusive 4★ Light Cone. Light Cone Ability: Raging Waves Increases the wearer’s CRIT Rate by 12%. After a CRIT Hit, there is a 16% fixed chance to dispel 1 buff on the target enemy. This effect can only trigger 1 time per attack. |
 | Swordplay is a Warp exclusive 4★ Light Cone. Light Cone Ability: Answers of Their Own For each time the wearer hits the same target, DMG dealt increases by 8%, stacking up to 5 time(s). This effect will be dispelled when the wearer changes targets. |
 | Only Silence Remains is a Warp exclusive 4★ Light Cone. Light Cone Ability: Record Increases the wearer’s ATK by 16%. If there are 2 or fewer enemies on the field, increases wearer’s CRIT Rate by 12%. |
Relics
In the early game, gearing with specific Relics and Planar Ornament sets is not necessary to progress. KQM will update this section as soon as we are able to confidently offer accurate rankings and evaluations.
Seele appreciates the Quantum DMG% and DEF ignore provided by the Genius of Brilliant Stars set.
Space Sealing Station provides Seele with additional ATK%.
Relic
| Genius of Brilliant Stars is a Relic set located in Jarilo-VI: Everwinter Hill. Relic Set Effect: 2pc: Increases Quantum DMG by 10%. 4pc: When the wearer deals DMG to the target enemy, ignores 10% DEF. If the target enemy has Quantum Weakness, the wearer additionally ignores 10% DEF. |
Planar Ornaments
 | Space Sealing Station is a Planar Ornament set located in Simulated Universe: World 3. Planar Ornament Set Effect: 2pc: Increases the wearer’s ATK by 12%. When the wearer’s SPD reaches 120 or higher, the wearer’s ATK increases by an extra 12%. |
Teambuilding
Seele works best as a main damage dealer, supported by units such as Bronya, Tingyun, Asta, Pela, Silver Wolf and Yukong who can greatly increase her damage through personal buffs or debuffing enemies. It is recommended to bring additional damaging or AoE characters such as Serval to help chip down enemies’ HP to a level where Seele can guarantee resets. Having at least one defensive unit such as Natasha is always recommended to keep Seele, as well of the rest of the team, alive.
Potential Support Options
| Bronya is a high-end option that can provide Speed control with her Turn Order advance and buff Seele’s damage with her damage bonus on her Skill. Bronya’s Ultimate provides additional ATK and CRIT bonuses for her team. | |
| Tingyun provides an ATK bonus with her Skill, as well as a DMG% buff on her ultimate. Additionally she can generate 50 Energy for a teammate with her Ultimate as well. This allows Seele to use her Ultimate more often. | |
| Pela provides AoE enemy DEF reduction through her Ultimate, as well as the ability to remove one Buff from an enemy through her Skill. | |
| Asta is a free option that provides a variable ATK bonus and Speed through her Ultimate for Seele. Her bounce Skill can also break Toughness efficiently against enemies with Fire Weakness. | |
| Silver Wolf is often a great option for single-target situations due to her DEF reduction and Elemental Weakness implant. This allows for more Weakness Breaks and damage dealt, and can allow certain Elements to thrive when they are usually not favored. As both characters as Quantum, you can build the rest of your team around the enemies’ non-Quantum Weaknesses. |
 | Yukong is an exceptionally strong buffer that can fit into many teams but has particular synergy with Seele. Due to how her Roaring Bowstrings mechanic works, Seele can end up “cheating” extra buffed turns thanks to her Resurgence not counting down the stacks. |
Potential AoE Options
| Serval is a free option that can be used to cover for Seele’s lack of AoE damage as well as help lower enemies’ HP enough for Seele to utilize her resets. |
Fire Trailblazer (Preservation)

Fire Trailblazer is a character obtained by completing the quest The Return, unlocked by reaching Trailblazer Level 24. They deal Fire damage and belong to the Preservation Path.
 | Fire is a damage-oriented Element that does a high amount of damage upon Weakness Break. The Burn effect lasts for two turns and does one instance of Fire damage per turn. It is not affected by enemy type. |
 | Path of Preservation: These characters possess powerful defensive abilities that protect their allies. |
How to Play
Fire Trailblazer is a tank unit with the capability to shield all allies through their Talent. With their Skill, they are able to potentially Taunt all enemies while providing DMG Reduction to the entire team. This can be useful in fights where enemies have certain lock-ons on allies because Fire Trailblazer can force the enemy to attack them. You can also use their Skill when the enemy is about to deal high damage to allies to reduce the damage taken.
Fire Trailblazer gains a stack of Magma Will every time they get hit, hit an enemy, or use their Skill, up to a maximum of 8 stacks. When Magma Will has at least 4 stacks, the Trailblazer’s Basic ATK becomes enhanced, dealing damage to a single enemy as well as to adjacent enemies. Fire Trailblazer’s Ultimate deals a good amount of AoE damage. After using Ultimate, the next Basic ATK will be enhanced and does not cost Magma Will stacks.
You generally only want to use Fire Trailblazer’s Skill when you need the Taunt or to provide DMG Reduction, and instead want to use their Basic ATKs often for its reliable Toughness Breaking. As such, Fire Trailblazer is a good unit to generate Skill Points for the team.
Light Cones
In the early game, gearing with specific Light Cones and Relics is not necessary to progress. KQM will update this section as soon as we are able to confidently offer accurate rankings and evaluations.
 | Moment of Victory is Gepard’s signature Light Cone 5★ and can be obtained on the Stellar Warp, as a non-rate up on the Light Cone Event Warp, or in the Starlight Exchange for 600 Starlight. Light Cone Ability: Verdict Increases the wearer’s DEF by 24% and Effect Hit Rate by 24%. Increases the chance for the wearer to be attacked by enemies. When the wearer is attacked, increase their DEF by an extra 24% until the end of the wearer’s turn. |
 | Landau’s Choice is a Warp exclusive 4★ Light Cone. Light Cone Ability: Time Fleets Away The wearer is more likely to be attacked, but DMG taken is reduced by 16%. |
 | Trend of Universal Market is a Warp exclusive 4★ Light Cone. Light Cone Ability: A New Round of Shuffling Increases the wearer’s DEF by 16%. When the wearer is attacked, there is a 100% base chance to Burn the enemy. For each turn, the wearer deals DoT that is equal to 40% of the wearer’s DEF for 2 turn(s). |
 | We Are Wildfire is a 4★ Light Cone that can be obtained from the weekly Echoes of War or purchased from the Light Cone Manifest from the Messenger in the Parlor Car. Light Cone Ability: Teary-Eyed At the start of the battle, the DMG dealt to all allies decreases by 8% for 5 turn(s). At the same time, immediately restores HP to all allies equal to 30% of the respective HP difference between the characters’ Max HP and current HP. |
 | Day One of My New Life is a Warp exclusive 4★ Light Cone. Light Cone Ability: At This Very Moment Increases the wearer’s DEF by 16%. After entering battle, increases DMG RES of all allies by 8%. Effects of the same type cannot stack. |
Relics
In the early game, gearing with specific Relics and Planar Ornament sets is not necessary to progress. KQM will update this section as soon as we are able to confidently offer accurate rankings and evaluations.
Fire Trailblazer can create stronger shields using Knight of Purity Palace, which grants DEF% and Shield absorption. If they use their Skill more often or otherwise draw enemies’ attacks, then Guard of Wuthering Snow is another option.
Belobog of the Architects strengthens Fire Trailblazer’s shield, and Effect Hit Rate can help with successfully Taunting enemies. Fleet of the Ageless is an excellent option, providing extra survivability from its Max HP% increase while providing an ATK% buff to party members.
Relic
 | Knight of Purity Palace is a Relic set located in Xianzhou Luofu: Cloudford. It can also be obtained when Trailblazers reach level 17, 32–35, 44, and 47. Relic Set Effect: 2pc: Increase DEF% by 15%. 4pc: Increases the max DMG that can be absorbed by the Shield created by the wearer by 20%. |
 | Guard of Wuthering Snow is a Relic set located in Jarilo-VI: Everwinter Hill. Relic Set Effect: 2pc: Reduces DMG taken by 8%. 4pc: At the beginning of the turn, if the wearer’s HP is equal to or less than 50%, restores HP equal to 8% of their Max HP and regenerates 5 Energy. |
Planar Ornaments
 | Belobog of the Architects is a Planar Ornament set located in Simulated Universe: World 6. Planar Ornament Set Effect: 2pc: Increases the wearer’s DEF by 15%. When the wearer’s Effect Hit Rate is 50% or higher, the wearer gains an extra 15% DEF. |
| Fleet of the Ageless is a Planar Ornament set located in Simulated Universe: World 3. Planar Ornament Set Effect: 2pc: Increases the wearer’s Max HP by 12%. When the wearer’s SPD reaches 120 or higher, all allies’ ATK increases by 8%. |
Teambuilding
Fire Trailblazer is widely applicable in team comps that require a shielder or defensive support. However, you should try to avoid pairing them with a unit like Clara, as Clara wants to be hit as much as possible to maximize her Counter’s damage. Fire Trailblazer also works well with characters who are very SP hungry because they generate a good amount of SP.
Physical Trailblazer (Destruction)

Physical Trailblazer is the first 5★ character that every player will automatically start the game with in Honkai: Star Rail. They deal Physical damage and belong to the Destruction Path.
 | Physical is a damage-oriented Element that does a high amount of damage upon Weakness Break. The Bleed effect lasts two turns and does one instance of Physical damage per turn. Bleed does more damage against non-Boss enemies, and less against Bosses. |
 | Path of Destruction: These characters focus on a general mix of damage and survivability. They are jack-of-all-trades suited for most combat scenarios. |
How to Play
Physical Trailblazer provides a good source of Physical damage as well as a significant amount of Weakness Break, especially in AoE situations.
Their gameplay revolves around their Skill and Ultimate, with the latter being able to enhance both Basic ATK and Skill, and slightly changing how they work. Using “Blowout: Farewell Hit” will inflict a powerful single-target hit, while “Blowout: RIP Home Run” will inflict decent damage to up to 3 targets.
The high amount of Physical Weakness Break available in their Skill and Ultimate synergizes especially well with their Talent, which grants them an ATK% buff whenever they inflict Weakness Break on an enemy, stacking up to 2 times.
Their Technique heals all allies for 15% of their Max HP. This can be useful in between battles to heal up any damage that may have been taken in the previous battle.
Light Cones
In the early game, gearing with specific Light Cones and Relics is not necessary to progress. KQM will update this section as soon as we are able to confidently offer accurate rankings and evaluations.
 | On the Fall of an Aeon is a 5★ Light Cone that can be purchased in the Simulated Universe Store for 8 Herta Bonds. You can purchase it after clearing Simulated Universe World 4 after Trailblazer Level 30. You can also purchase Superimpositions. Light Cone Ability: Moth to Flames Whenever the wearer attacks, their ATK is increased by 8% in this battle, up to 4 time(s). When the wearer inflicts Weakness Break on enemies, the wearer’s DMG increases by 12% for 2 turn(s). |
 | Something Irreplaceable is Clara’s signature 5★ Light Cone and can be obtained on the Stellar Warp, as a non-rate up on the Light Cone Event Warp, or in the Starlight Exchange for 600 Starlight. Light Cone Ability: Kinship Increases the wearer’s ATK by 24%. When the wearer defeats an enemy or is hit, immediately restores HP equal to 8% of the wearer’s ATK. At the same time, the wearer’s DMG is increased by 24% until the end of their next turn. This effect cannot stack and can only trigger 1 time per turn. |
 | The Moles Welcome You is a Warp exclusive 4★ Light Cone. Light Cone Ability: Fantastic Adventure When the wearer uses Basic ATK, Skill, or Ultimate to attack enemies, the wearer gains one stack of Mischievous. Each stack increases the wearer’s ATK by 12%. |
 | A Secret Vow is a Warp exclusive 4★ Light Cone. Light Cone Ability: Spare No Effort Increases DMG dealt by the wearer by 20%. The wearer also deals an extra 20% of DMG to enemies with a higher HP percentage than the wearer. |
 | Woof! Walk Time! is a 4★ Light Cone that can be obtained from the weekly Echoes of War or purchased from the Light Cone Manifest from the Messenger in the Parlor Car. Light Cone Ability: Run! Increases the wearer’s ATK by 10%, and increases their DMG to enemies afflicted with Burn or Bleed by 16%. This also applies to DoT. |
 | Collapsing Sky is a Warp exclusive 3★ Light Cone. Light Cone Ability: Havoc Increases the wearer’s Basic ATK and Skill DMG by 20%. |
Relics
In the early game, gearing with specific Relics and Planar Ornament sets is not necessary to progress. KQM will update this section as soon as we are able to confidently offer accurate rankings and evaluations.
Physical Trailblazer benefits from both the ATK% and Physical DMG% from the Champion of Streetwise Boxing set. They can also benefit from the ATK%, SPD, and Basic ATK DMG from the Musketeer of Wild Wheat set.
Similarly, Space Sealing Station can provide Physical Trailblazer with a sizable amount of ATK%. Inert Salsotto is a good option as well, giving a small CRIT Rate boost and increasing DMG dealt by their Ultimate.
Relic
 | Champion of Streetwise Boxing is a Relic set located in Jarilo-VI: Silvermane Guard Restricted Zone. It can also be obtained by spending Shields at the Underground Shop in: Jarilo-VI: Boulder Town. Relic Set Effect: 2pc: Increases Physical DMG by 10%. 4pc: After the wearer attacks or is hit, their ATK increases by 5% for the rest of the battle. This effect can stack up to 5 time(s). |
| Musketeer of Wild Wheat is a Relic set located in Jarilo-VI: Corridor of Fading Echoes. It can also be obtained in Echoes of War and by spending Hertareum at the Internal Purchase Officer in Herta Space Station: Master Control Zone. Relic Set Effect: 2pc: ATK increases by 12%. 4pc: The wearer’s SPD increases by 6% and Basic ATK DMG increases by 10%. |
Planar Ornaments
| Space Sealing Station is a Planar Ornament set located in Simulated Universe: World 3. Planar Ornament Set Effect: 2pc: Increases the wearer’s ATK by 12%. When the wearer’s SPD reaches 120 or higher, the wearer’s ATK increases by an extra 12%. |
| Inert Salsotto is a Planar Ornament set located in Simulated Universe: World 6. Planar Ornament Set Effect: 2pc: Increases the wearer’s CRIT Rate by 8%. When the wearer’s current CRIT Rate reaches 50% or higher, the wearer’s Ultimate and follow-up attack DMG increases by 15%. |
Teambuilding
Physical Trailblazer has a consistent damage output on their own thanks to their Talent, and is a flexible unit who can complement many other damage dealing characters. Like many other dedicated damage dealers, they can work well with Harmony and Nihility characters to boost their own damage farther.
Potential Buff Opinions
| Bronya is a high-end option that provides Turn Advance, DMG%, CRIT DMG, and ATK buffs. This complements the Trailblazer’s own ATK buffs from their Talent, as well as the increased CRIT Rate they get against Weakness Broken foes from their E4. | |
| Tingyun provides an ATK bonus with her Skill, as well as a DMG% buff on her Ultimate. She can generate 50 Energy for a teammate with her Ultimate and this allows Trailblazer to use their strong Ultimate more often. | |
| Pela provides AoE enemy DEF reduction through her Ultimate thus increasing the Trailblazer’s damage farther. | |
| Asta is a free option that provides a variable ATK bonus and SPD through her Ultimate for Trailblazer. Asta’s Break capabilities with her Bounce Skill can help set up the Trailblazer to be the one who Breaks enemies and therefore stack their Talent more easily. |
Bronya
Bronya is one of the 5★ characters available from the Departure Warp in Honkai: Star Rail. She deals Wind damage and belongs to the Harmony Path.
 | Wind is a damage-oriented Element that does a moderate amount of damage upon Weakness Break. The Wind Shear effect lasts for two turns and does one instance of Wind damage per turn. It does more damage against Elite and Boss enemies. |
 | Path of Harmony: These characters apply buffs that improve the team’s combat capabilities. |
How to Play
Bronya offers her team significant damage buffs through the use of her Skill and Ultimate.
Her Skill dispels debuffs and grants a DMG% increase. If her Skill is used on someone other than herself then the target can immediately take action. This is a flexible tool that allows you to change the turn order of units to react to different situations such as switching to a healer or shielder in emergencies or switching to a different Element for breaking Weaknesses. The common use of Bronya’s Skill is to focus on buffing the primary damage dealer on the team.
Bronya’s Ultimate increases her party’s ATK% and CRIT DMG based on her own CRIT DMG. Additionally, since her first Trace grants her 100% CRIT Rate, she is incentivized to use a CRIT DMG Body Relic.
It is recommended to use her Ultimate before chaining multiple attacks from your damage dealer to get the most value out of her buff.
Bronya’s Talent allows her to take turns more often when using her Basic ATK, allowing her to function as an SP generator for other units. This is incredibly useful for SP-hungry teammates such as Seele or Qingque.
Light Cones
In the early game, gearing with specific Light Cones and Relics is not necessary to progress. KQM will update this section as soon as we are able to confidently offer accurate rankings and evaluations.
 | But the Battle Isn’t Over is Bronya’s signature 5★ Warp exclusive Light Cone and can be obtained on the Stellar Warp, as a non-rate up on the Light Cone Event Warp, or in the Starlight Exchange for 600 Starlight. Light Cone Ability: Heir Increases the wearer’s Energy Regeneration Rate by 10% and regenerates 1 Skill Point when the wearer uses their Ultimate on an ally. This effect can be triggered after every 2 uses of the wearer’s Ultimate. When the wearer uses their Skill, the next ally taking action (except the wearer) deals 30% more DMG for 1 turn(s). |
 | Carve the Moon, Weave the Clouds is a Nameless Honor exclusive 4★ Light Cone. Light Cone Ability: Secret At the start of the battle and whenever the wearer’s turn begins, one of the following effects is applied randomly: All allies’ ATK increases by 10%, all allies’ CRIT DMG increases by 12%, or all allies’ Energy Regeneration Rate increases by 6%. The applied effect cannot be identical to the last effect applied, and will replace the previous effect. The applied effect will be removed when the wearer has been knocked down. Effects of the similar type cannot be stacked. |
 | Dance! Dance! Dance! is a 4★ Warp exclusive Light Cone. Light Cone Ability: Cannot Stop It! When the wearer uses their Ultimate, all allies’ actions are Advanced Forward by 16%. |
 | Past and Future is a 4★ Light Cone that can be obtained from the weekly Echoes of War or purchased from the Light Cone Manifest from the Messenger in the Parlor Car. Light Cone Ability: Kites From the Past When the wearer uses their Skill, then the next ally taking action (except the wearer) deals 16% increased DMG for 1 turn(s). |
 | Memories of the Past is a 4★ Warp exclusive Light Cone. Light Cone Ability: Old Photos Increases the wearer’s Break Effect by 28%. When the wearer attacks, additionally regenerates 4 Energy. This effect can only be triggered 1 time per turn. |
 | Meshing Cogs is a 3★ Warp exclusive Light Cone. Light Cone Ability: Fleet Triumph After the wearer uses attacks or gets hit, additionally regenerates 4 Energy. This effect can only be triggered 1 time per turn. |
Relics
In the early game, gearing with specific Relics and Planar Ornament sets is not necessary to progress. KQM will update this section as soon as we are able to confidently offer accurate rankings and evaluations.
Bronya doesn’t benefit much from the current relic sets available. Musketeer of Wild Wheat or Eagle of Twilight Line can both give her more turns in long enough fights.
Fleet of the Ageless can increase Bronya’s survivability and provide her teammates with an ATK% buff.
Relic
| Musketeer of Wild Wheat is a Relic set located in Jarilo-VI: Corridor of Fading Echoes. It can also be obtained in Echoes of War and by spending Hertareum at the Internal Purchase Officer in Herta Space Station: Master Control Zone. Relic Set Effect: 2pc: ATK increases by 12%. 4pc: The wearer’s SPD increases by 6% and Basic ATK DMG increases by 10%. |
 | Eagle of Twilight Line is a Relic set located in Herta Space Station: Storage Zone. It can also be obtained by completing the Winter Soldiers’ March Adventure Mission in the Silvermane Guard Restricted Zone. Relic Set Effect: 2pc: Increases Wind DMG by 10%. 4pc: After the wearer uses their Ultimate, their action is Advanced Forward by 25%. |
Planar Ornaments
| Fleet of the Ageless is a Planar Ornament set located in Simulated Universe: World 3. Planar Ornament Set Effect: 2pc: Increases the wearer’s Max HP by 12%. When the wearer’s SPD reaches 120 or higher, all allies’ ATK increases by 8%. |
Teambuilding
Bronya has strong synergy with damage dealers that can appreciate her Buffs such as Dan Heng and Seele. At least one defensive unit is also recommended as Bronya and her damage dealing partners tend to not offer damage mitigation. Fire Trailblazer or Natasha are great options for this role since their Skill Point needs are lower than most.
Potential Damage Dealer Options
| Dan Heng is one of the starting units and can efficiently use Bronya’s buffing power to decimate Bosses. Him being Wind does reduce the Elemental diversity of the team which can be problematic in some situations. | |
| Seele is a selfish damage dealer that can make use of Bronya’s buffs and Skill Point generation. |
Clara
Clara is one of the 5★ characters available from the Departure Warp in Honkai: Star Rail. She deals Physical damage and belongs to the Destruction Path.
| Physical is a damage-oriented Element that does a high amount of damage upon Weakness Break. The Bleed effect lasts two turns and does one instance of Physical damage per turn. Bleed does more damage against non-Boss enemies, and less against Bosses. |
| Path of Destruction: These characters focus on a general mix of damage and survivability. They are jack-of-all-trades suited for most combat scenarios. |
How to Play
Clara is a Physical damage dealer whose kit is based around her Talent, providing her the ability to counterattack enemies, with her Ultimate further reducing the damage she takes and increasing her counterattacking capabilities.
Clara uses her Talent to constantly punish enemies attempting to attack her or her team. She has a permanent 10% damage reduction on all incoming attacks and when she is hit, Svarog immediately returns fire with a percentage of her attack and puts a Mark of Counter (Marks of Counter cause her Skill to do more damage) on enemies hit. This ability allows her to be a very good source of passive damage that requires little to no set up.
When Clara uses her Ultimate ability, she gains two charges of an enhanced counter that can be triggered by any of her allies taking damage. Svarog’s enhanced counterattack damage is increased and becomes an area-of-effect attack that deals 50% damage to enemies adjacent to the target. Clara additionally raises her aggression and her damage reduction for two turns.
With enemies constantly hitting her, Clara’s Ultimate will be charged at a higher rate allowing her to increase her damage output and survivability more often. With this in mind, using Clara with March 7th’s shielding Skill allows her to increase her Aggro for more consistent counters, while keeping her health from dropping.
Keeping Clara’s health topped up with March 7th’s shield is your ideal goal as it will also increase Clara’s Aggro against enemies. Use your Ultimate whenever possible to reduce damage taken and increase damage dealt and follow up with your ability after your opponents have hit you to maximize damage output.
Light Cones
In the early game, gearing with specific Light Cones and Relics is not necessary to progress. KQM will update this section as soon as we are able to confidently offer accurate rankings and evaluations.
| Something Irreplaceable is Clara’s signature 5★ Light Cone and can be obtained on the Stellar Warp, as a non-rate up on the Light Cone Event Warp, or in the Starlight Exchange for 600 Starlight. Light Cone Ability: Kinship Increases the wearer’s ATK by 24%. When the wearer defeats an enemy or is hit, immediately restores HP equal to 8% of the wearer’s ATK. At the same time, the wearer’s DMG is increased by 24% until the end of their next turn. This effect cannot stack and can only trigger 1 time per turn. |
| On the Fall of an Aeon is a 5★ Light Cone that can be purchased in the Simulated Universe Store for 8 Herta Bonds. You can purchase it after clearing Simulated Universe World 4 after Trailblazer Level 30. You can also purchase Superimpositions. Light Cone Ability: Moth to Flames Whenever the wearer attacks, their ATK is increased by 8% in this battle, up to 4 time(s). When the wearer inflicts Weakness Break on enemies, the wearer’s DMG increases by 12% for 2 turn(s). |
| The Moles Welcome You is a Warp exclusive 4★ Light Cone. Light Cone Ability: Fantastic Adventure When the wearer uses Basic ATK, Skill, or Ultimate to attack enemies, the wearer gains one stack of Mischievous. Each stack increases the wearer’s ATK by 12%. |
| A Secret Vow is a Warp exclusive 4★ Light Cone. Light Cone Ability: Spare No Effort Increases DMG dealt by the wearer by 20%. The wearer also deals an extra 20% of DMG to enemies with a higher HP percentage than the wearer. |
| Woof! Walk Time! is a 4★ Light Cone that can be obtained from the weekly Echoes of War or purchased from the Light Cone Manifest from the Messenger in the Parlor Car. Light Cone Ability: Run! Increases the wearer’s ATK by 10%, and increases their DMG to enemies afflicted with Burn or Bleed by 16%. This also applies to DoT. |
Relics
In the early game, gearing with specific Relics and Planar Ornament sets is not necessary to progress. KQM will update this section as soon as we are able to confidently offer accurate rankings and evaluations.
Clara appreciates the Physical DMG% and ATK% provided by the Champion of Streetwise Boxing set, and can quickly gain its stacks through her counters. For a much more defensive build, Guard of Wuthering Snow will keep Clara alive and give her some extra energy.
Inert Salsotto gives CRIT Rate, and gives extra DMG% to Svarog’s counterattacks.
Relic
| Champion of Streetwise Boxing is a Relic set located in Jarilo-VI: Silvermane Guard Restricted Zone. It can also be obtained by spending Shields at the Underground Shop in: Jarilo-VI: Boulder Town. Relic Set Effect: 2pc: Increases Physical DMG by 10%. 4pc: After the wearer attacks or is hit, their ATK increases by 5% for the rest of the battle. This effect can stack up to 5 time(s). |
| Guard of Wuthering Snow is a Relic set located in Jarilo-VI: Everwinter Hill. Relic Set Effect: 2pc: Reduces DMG taken by 8%. 4pc: At the beginning of the turn, if the wearer’s HP is equal to or less than 50%, restores HP equal to 8% of their Max HP and regenerates 5 Energy. |
Planar Ornaments
| Space Sealing Station is a Planar Ornament set located in Simulated Universe: World 3. Planar Ornament Set Effect: 2pc: Increases the wearer’s ATK by 12%. When the wearer’s SPD reaches 120 or higher, the wearer’s ATK increases by an extra 12%. |
| Inert Salsotto is a Planar Ornament set located in Simulated Universe: World 6. Planar Ornament Set Effect: 2pc: Increases the wearer’s CRIT Rate by 8%. When the wearer’s current CRIT Rate reaches 50% or higher, the wearer’s Ultimate and follow-up attack DMG increases by 15%. |
Teambuilding
Clara works well with characters that can increase her Aggro, such as March 7th. Supports such as Tingyun and Silver Wolf can still help provide additional damage and utility for Clara. Running a healer like Bailu or Natasha can also come in handy to keep both Clara as well as her allies in the fight.
Avoid using characters that will draw Aggro away from her like Gepard, as Clara wants to be hit as much as possible to maximize her counter’s damage.
Potential Taunt Synergy Units
| March 7th’s ability to always grant Clara a shield and increase her Aggro ensures that enemies will tend to focus her, while keeping her nice and healthy in order to maximize the use of Clara’s Talent. |
Potential Support Options
| Tingyun provides an ATK and DMG bonus for Clara’s Skill and can generate 50 Energy for her Ultimate, helping her maintain aggro draw. Additionally, Tingyun’s Benediction can be triggered off of Clara’s counter-attack, without decreasing the duration of the buff. | |
| Silver Wolf is often a great option for single-target situations due to her DEF reduction and Elemental Weakness implant. This allows for more Weakness Breaks and damage dealt, and can allow certain Elements to thrive when they are usually not favored. |
Welt

Welt is one of the 5★ characters available from the Departure Warp in Honkai: Star Rail. He deals Imaginary damage and belongs to the Nihility Path.
| Imaginary provides strong crowd control. When an enemy is Weakness Broken by Imaginary DMG, the enemy is pushed down in the turn order (even more than when broken by Quantum) and inflicted with Imprisonment, which reduces the enemy’s Speed stat as well as further delaying their action. |
| Path of Nihility: These characters apply debuffs to enemies that reduce their combat capabilities. |
How to Play
Welt is a support/damage dealer, focusing on Slowing and delaying enemy actions through his Skill and Ultimate. Welt’s Skill is a multi-hit attack that has a chance to Slow enemies on each hit, serving a dual purpose of AoE debuffing as well as powerful single-target Imaginary Toughness Break.
His Ultimate can apply AoE Imprisonment, Slowing all enemies by 10% and delaying their actions by 30% at Trace Level 1 to enhance his turn manipulation abilities, allowing allies to take extra actions before enemies have a chance to act. His A2 Trace adds another effect to his Ultimate, increasing enemy DMG taken by 12% for 2 turns.
Welt’s Talent offers him additional damage to Slowed targets—a condition he has no trouble maintaining.
Welt’s Technique allows him to set up difficult battles by applying Imprisonment on all enemies for 1 turn, slowing them by 10% and delaying their actions by 20%, giving you the opportunity to defeat some enemies outright before they have any chance to act.
Light Cones
In the early game, gearing with specific Light Cones and Relics is not necessary to progress. KQM will update this section as soon as we are able to confidently offer accurate rankings and evaluations.
 | In the Name of the World is Welt’s signature 5★ Light Cone that is and can be obtained from Warps, or bought for 600 Starlight in the Starlight Exchange. Light Cone Ability: Inheritor Increases the wearer’s DMG to debuffed enemies by 24%. When the wearer uses their Skill, the Effect Hit Rate for this attack increases by 18%, and ATK increases by 24%. |
 | Good Night and Sleep Well is a 4★ Warp exclusive Light Cone. Light Cone Ability: Toiler For every debuff the target enemy has, the DMG dealt by the wearer increases by 12%, stacking up to 3 time(s). This effect also applies to DoT. |
| Resolution Shines As Pearls of Sweat is a Warp exclusive 4★ Light Cone. This Light Cone’s Ability synergizes with Welt’s multi-hit Skill, granting him a high chance to trigger its effect. Light Cone Ability: Glance Back When the wearer hits an enemy and if the hit enemy is not already Ensnared, then there is a 60% base chance to Ensnare the hit enemy. Ensnared enemies’ DEF decreases by 12% for 1 turn(s). |
 | We Will Meet Again is a Nameless Honor exclusive 4★ Light Cone. Light Cone Ability: A Discourse in Arms After the wearer uses Basic ATK or Skill, deals Additional DMG equal to 48% of the wearer’s ATK to a random enemy that has been attacked. |
 | Loop is a 3★ Light Cone that can be obtained from Warps & chests. Welt reliably applies Slow through his Skill and Ultimate, so he has high uptime on this Light Cone Ability. Light Cone Ability: Pursuit Increases DMG dealt from its wearer to Slowed enemies by 24%. |
Relics
In the early game, gearing with specific Relics and Planar Ornament sets is not necessary to progress. KQM will update this section as soon as we are able to confidently offer accurate rankings and evaluations.
Welt works very well with the Wastelander of Banditry Desert set, which gives him additional Imaginary DMG%. It also increases his CRIT Rate and CRIT DMG against enemies who are debuffed or Imprisoned, both of which he already applies to enemies.
Space Sealing Station provides Welt with additional ATK%. Another option is Pan-Cosmic Commercial Enterprise, which gives a smaller ATK% buff along with extra Effect Hit Rate.
Relic
 | Wastelander of Banditry Desert is a Relic set located in Xianzhou Luofu: Stargazer Navalia. Relic Set Effect: 2pc: Increases Imaginary DMG by 10%. 4pc: When attacking debuffed enemies, the wearer’s CRIT Rate increases by 10%, and their CRIT DMG increases by 20% against Imprisoned enemies. |
Planar Ornaments
| Space Sealing Station is a Planar Ornament set located in Simulated Universe: World 3. Planar Ornament Set Effect: 2pc: Increases the wearer’s ATK by 12%. When the wearer’s SPD reaches 120 or higher, the wearer’s ATK increases by an extra 12%. |
| Pan-Cosmic Commercial Enterprise is a Planar Ornament set located in Simulated Universe: World 5. Planar Ornament Set Effect: 2pc: Increases the wearer’s Effect Hit Rate by 10%. Meanwhile, the wearer’s ATK increases by an amount that is equal to 25% of the current Effect Hit Rate, up to a maximum of 25%. |
Teambuilding
Welt has general synergy with almost all damage dealers, providing enemy Slow and Action Delay, allowing you to perform extra actions. In single-target situations, Welt makes short work of enemies that are weak to Imaginary. He synergises with other Harmony characters that can provide Speed or Advance Forward.
Welt is a versatile character that can also be played in the damage dealer role by focusing buffs onto himself rather than another character. His kit offers him multiple sources of DMG% to boost his own damage with his skill being particularly damaging in single-target situations.
Potential Damage Dealer Options
| Seele is a high Speed damage dealer that can take advantage of Slowed enemies in order to squeeze in extra actions. | |
| Serval is an AoE damage dealer that can benefit from Welt’s AoE DMG% debuff. | |
| Himeko is another AoE damage dealer that benefits from Welt’s AoE DMG% debuff as well as his efficient single-target Toughness Break against enemies that are weak to Imaginary. |
Potential Support Options
| Bronya combined with Welt allows for powerful turn manipulation through Advancing allies forward while Delaying enemy actions. | |
| Tingyun is a support that provides DMG% and ATK% buffs for your damage dealer and can provide Energy for Welt’s Ultimate to ensure maximum uptime on his DMG% debuff. | |
| Asta is a support that provides the team with a powerful Speed buff synergizing with Welt’s own enemy Slow debuff. She also has a multi-hit Skill that can break Toughness efficiently against enemies weak to Fire, though this will depend on RNG. | |
| Yukong is an excellent buffer option for Welt due to her very high buff multipliers as well as her Imaginary DMG% bonus. Beyond that, Welt and Yukong are a strong pairing due to their high Break potential – meaning they can abuse Imprison and CC an enemy for extended periods of time. |
Potential Sustain Options
| While any sustain units will suffice, Luocha can be a great option to pair with Welt. Both are very effective at dealing with the Toughness Bars of Imaginary Weak enemies, and together can ensure Imaginary Breaks to Imprison enemies. |
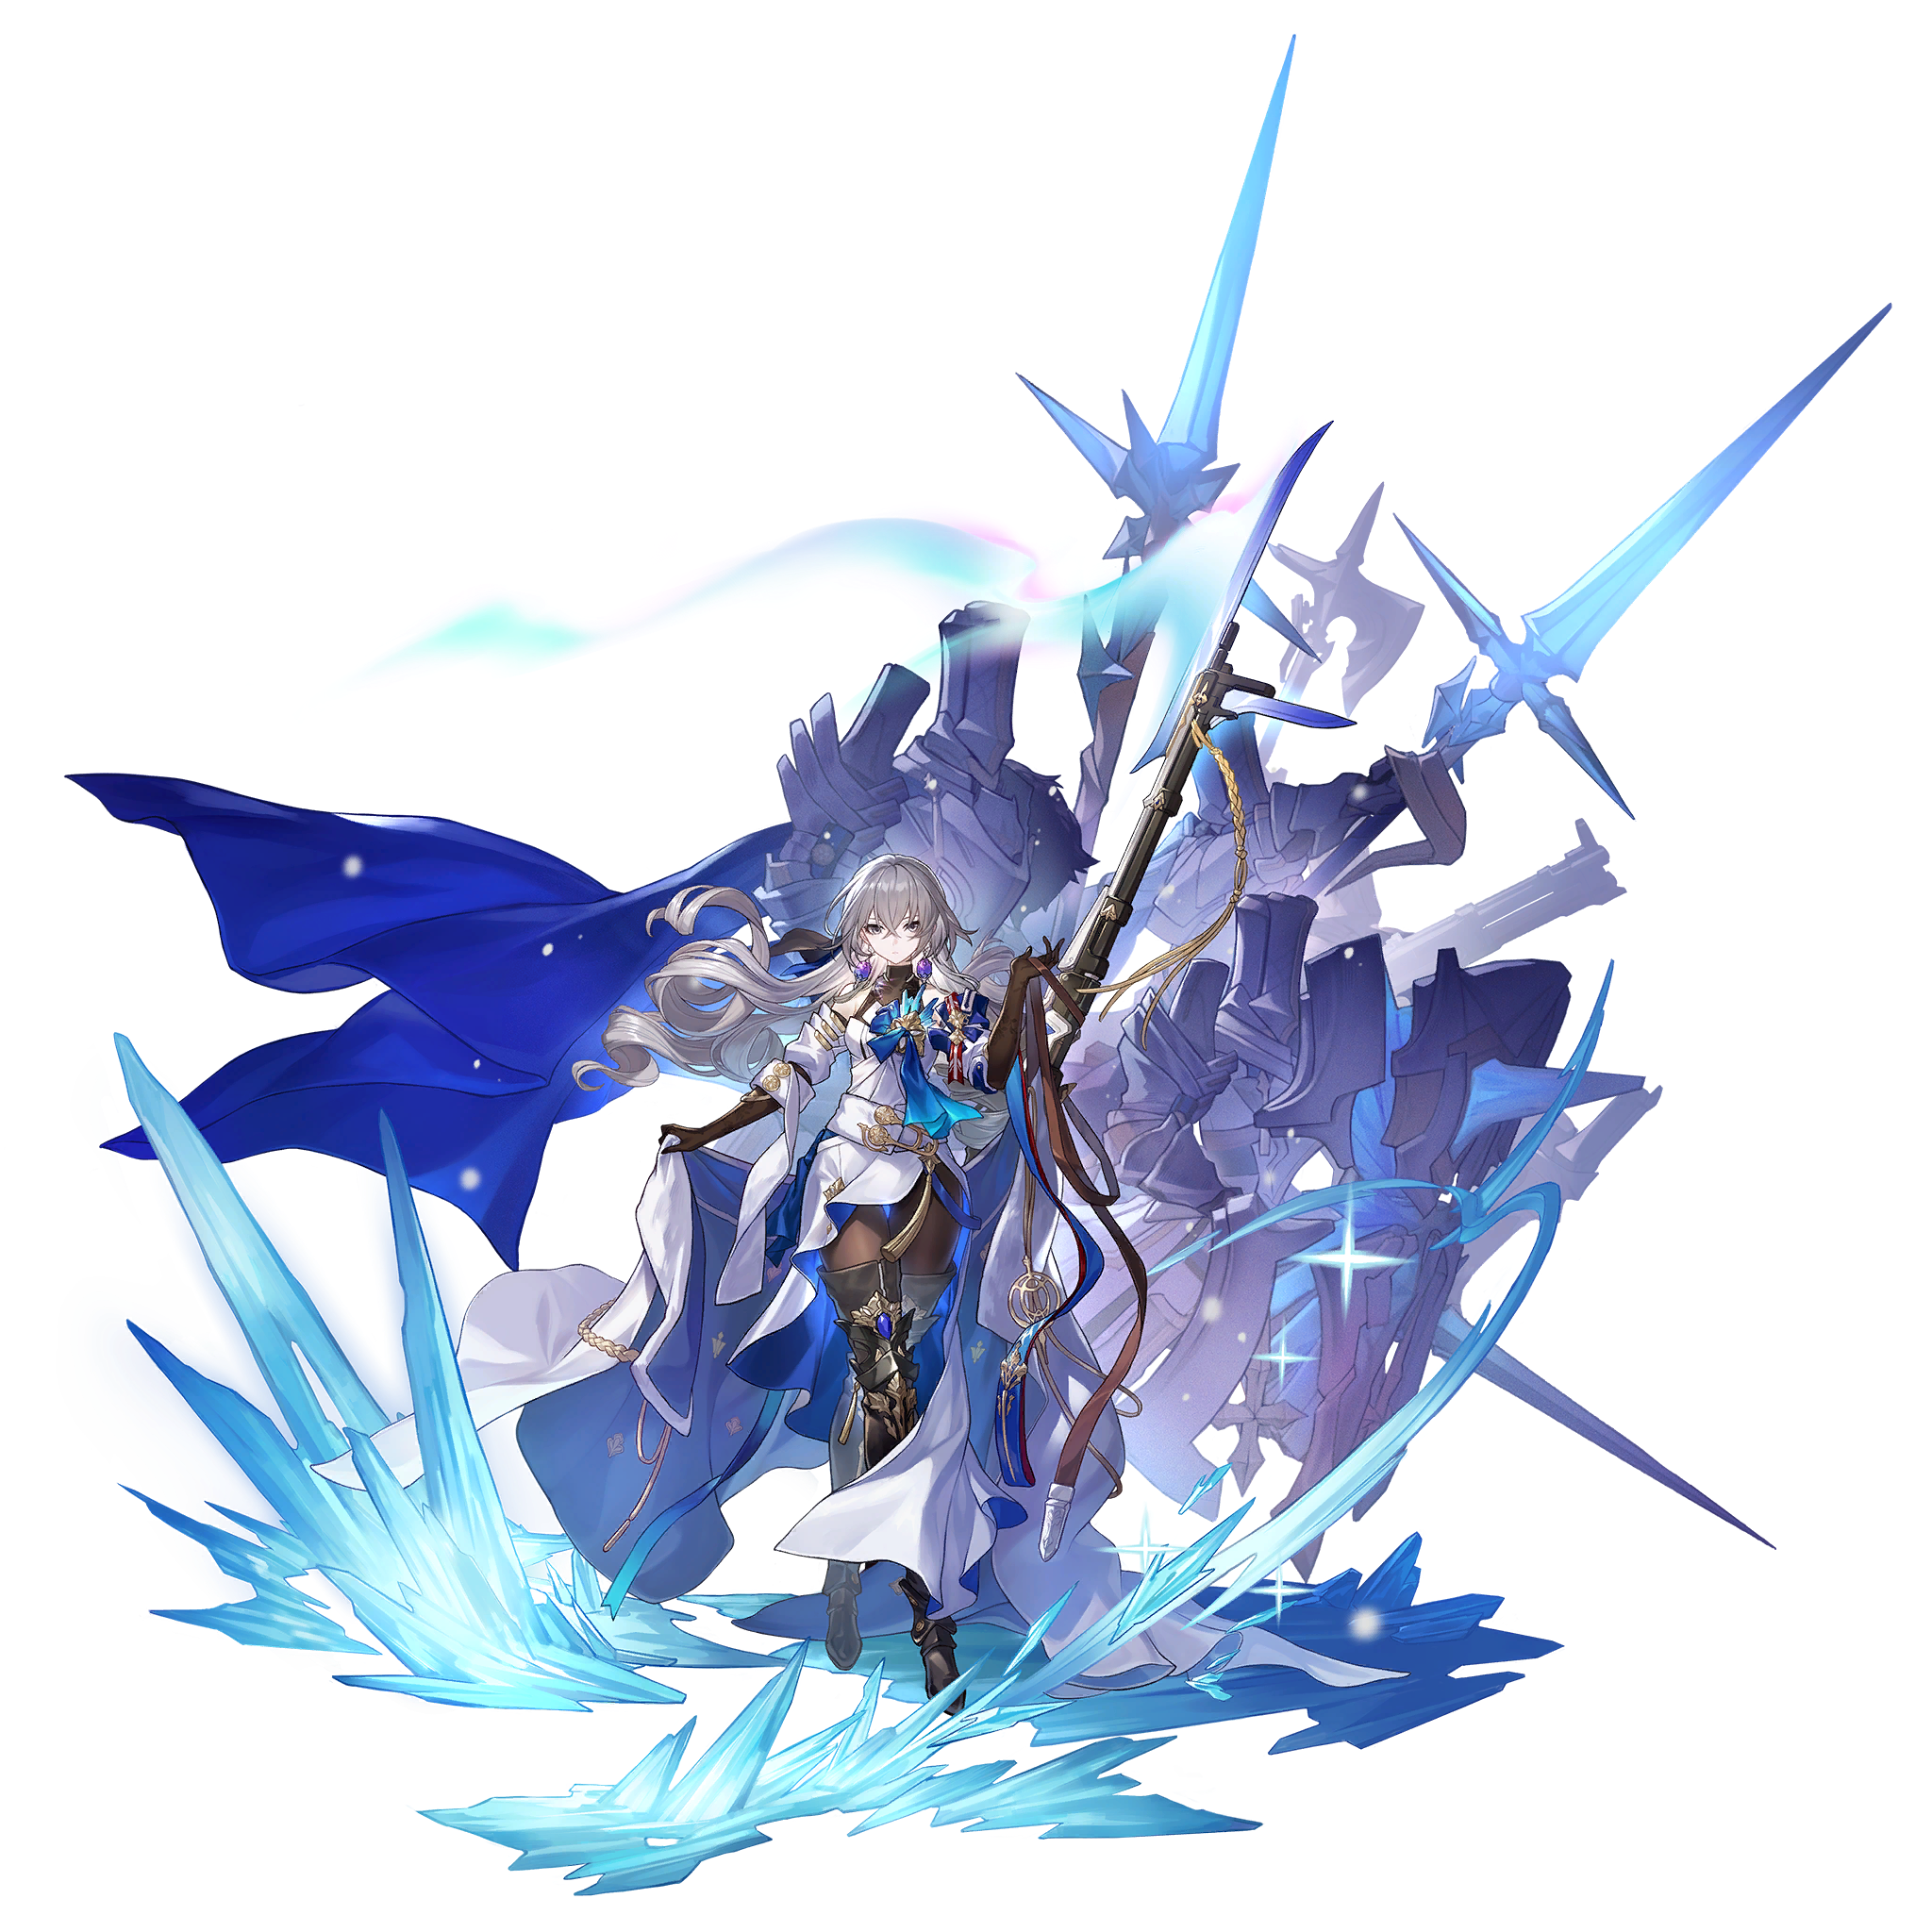
Yanqing
Yanqing is one of the 5★ characters available from the Departure Warp in Honkai: Star Rail. He deals Ice damage and belongs to The Hunt Path.
 | Ice provides a mix of crowd control and damage. The Freeze effect lasts until the enemy’s next turn. When that enemy’s next turn begins, the Freeze effect expires, dealing damage and preventing the enemy from taking action on that turn as well delaying their next action by 50%. |
| Path of The Hunt: These characters focus on high single-target damage. They function best as the main damage dealer against Boss and Elite enemies. |
How to Play
Yanqing is an Ice damage dealer that deals strong single-target damage across many turns with his Talent, provided he doesn’t take damage himself. Maintaining his Talent uptime is critical as the follow-up attacks will significantly increase his damage and Energy generation when triggered.
Yanqing is incentivized to use his Skill as often as possible to maintain his passive. Using Basic ATKs with Yanqing will also cause him to drop his buff. Plan your moves ahead of time carefully so that you have a Skill Point to spare for him.
Maintain a healthy shield on Yanqing, and ideally your Taunt unit as well, to maintain Talent uptime and his damage.
Light Cones
In the early game, gearing with specific Light Cones and Relics is not necessary to progress. KQM will update this section as soon as we are able to confidently offer accurate rankings and evaluations.
 | Sleep Like the Dead is Yanqing’s signature 5★ Light Cone and can be obtained on the Stellar Warp, as a non-rate up on the Light Cone Event Warp, or in the Starlight Exchange for 600 Starlight. Light Cone Ability: Sweet Dreams Increases the wearer’s CRIT DMG by 30%. When the wearer’s Basic ATK or Skill does not result in a CRIT Hit, increases their CRIT Rate by 36% for 1 turn(s). This effect can only trigger once every 3 turn(s). |
| In The Night is Seele’s signature 5★ Light Cone and can be obtained from the Light Cone Event Warp. Light Cone Ability: Flowers and Butterflies Increases the wearer’s CRIT Rate by 18%. While the wearer is in battle, for every 10 SPD that exceeds 100, the DMG of the wearer’s Basic ATK and Skill is increased by 6% and the CRIT DMG of their Ultimate is increased by 12%. This effect can stack up to 6 time(s). |
| Cruising in the Stellar Sea is a 5★ Light Cone that can be purchased from the Simulated Universe Store for 8 Herta Bonds. You can purchase it after clearing Simulated Universe World 4 after Trailblazer Level 30. You can also purchase Superimpositions. Light Cone Ability: Chase Increases the wearer’s CRIT Rate by 8%, and increases their CRIT Rate against enemies with HP less than or equal to 50% by an extra 8%. When the wearer defeats an enemy, their ATK is increased by 20% for 2 turn(s). |
| River Flows in Spring is a 4★ Light Cone that can be obtained from the weekly Echoes of War or purchased from the Light Cone Manifest from the Messenger in the Parlor Car. Light Cone Ability: Stave Off the Lingering Cold After entering battle, increase the wearer’s SPD by 8% and DMG by 12%. When the wearer takes DMG, this effect will disappear. This effect will resume after the end of the wearer’s next turn. |
| Return to Darkness is a Nameless Honor exclusive 4★ Light Cone. Light Cone Ability: Raging Waves Increases the wearer’s CRIT Rate by 12%. After a CRIT Hit, there is a 16% fixed chance to dispel 1 buff on the target enemy. This effect can only trigger 1 time per attack. |
| Swordplay is a Warp exclusive 4★ Light Cone. Light Cone Ability: Answers of Their Own For each time the wearer hits the same target, DMG dealt increases by 8%, stacking up to 5 time(s). This effect will be dispelled when the wearer changes targets. |
| Only Silence Remains is a Warp exclusive 4★ Light Cone. Light Cone Ability: Record Increases the wearer’s ATK by 16%. If there are 2 or fewer enemies on the field, increases wearer’s CRIT Rate by 12%. |
Relics
In the early game, gearing with specific Relics and Planar Ornament sets is not necessary to progress. KQM will update this section as soon as we are able to confidently offer accurate rankings and evaluations.
Yanqing appreciates the extra Ice DMG% from the Hunter of Glacial Forest set. It also gives him extra CRIT DMG after using his Ultimate, which works well with the large CRIT Rate buff his Ultimate gives.
Inert Salsotto gives Yanqing extra CRIT Rate. It also gives him more DMG% for his Ultimate and follow-up attacks, since he gets a lot of CRIT Rate from his Talent and Ultimate. Another option is Space Sealing Station, which gives him ATK%.
Relic
 | Hunter of Glacial Forest is a Relic set located in Herta Space Station: Storage Zone. It can also be obtained by completing Operation Briefing (Part 5). Relic Set Effect: 2pc: Increases Ice DMG by 10%. 4pc: After the wearer uses their Ultimate, their CRIT DMG increases by 25% for 2 turn(s). |
Planar Ornaments
| Space Sealing Station is a Planar Ornament set located in Simulated Universe: World 3. Planar Ornament Set Effect: 2pc: Increases the wearer’s ATK by 12%. When the wearer’s SPD reaches 120 or higher, the wearer’s ATK increases by an extra 12%. |
| Inert Salsotto is a Planar Ornament set located in Simulated Universe: World 6. Planar Ornament Set Effect: 2pc: Increases the wearer’s CRIT Rate by 8%. When the wearer’s current CRIT Rate reaches 50% or higher, the wearer’s Ultimate and follow-up attack DMG increases by 15%. |
Teambuilding
Yanqing works best alongside units such as Bronya and Tingyun that can buff his personal damage. Defensive options that can redirect attacks are heavily recommended to help maintain the Soulsteel Sync effect, with Gepard being the best fit for this role. Alternatively, Fire Trailblazer and March 7th are decent options if Gepard is unavailable. Certain content will also require a healer, in which case it’s also recommended to run a healer such as Natasha, Bailu, or Luocha to help keep Yanqing and the rest of the team alive.
Potential Support Options
| Bronya is a high-end option that can provide Speed control with her turn order advance and buff Yanqing’s damage with her damage bonus on her Skill. Granting Yanqing more turns gives you more opportunities to trigger follow-up attacks and Freeze your opponents provided you have enough Skill Points to spare. Bronya’s Ultimate provides additional ATK and CRIT bonuses for her team. | |
| Tingyun provides an ATK bonus on her Skill as well as a DMG bonus from her Ultimate, and can generate 50 Energy for Yanqing’s Ultimate while dedicating very few Skill Points doing so. This allows Yanqing to deal more damage and use his Ultimate and Skill more frequently. | |
| Asta is a free option that can provide a variable ATK buff and a Speed bonus for Yanqing to get more attacks in with his Talent active, and can help break Toughness efficiently against enemies with Fire Weakness. | |
| Silver Wolf is often a great option for single-target situations due to her DEF reduction and Elemental Weakness implant. This allows for more Weakness Breaks and damage dealt, and can allow certain Elements to thrive when they are usually not favored. |
Potential Defensive Options
| Gepard is currently Yanqing’s best defensive support. He can provide his whole team with a large shield, while simultaneously drawing Aggro away from Yanqing. His Skill can also be used to freeze an enemy. |
 | Fire Trailblazer is a free option that can provide reliable attack redirection, minor AoE shielding, and damage reduction for your team. Fire Trailblazer uses their Basic ATK very often and will help ensure that your Yanqing has a steady stream of SP to constantly use his Skill. |
| March 7th’s shield and Preservation Path can draw Aggro away from Yanqing by shielding other party members, and can also provide a shield to Yanqing himself to prevent AoE damage too large to prevent otherwise. Shielding Yanqing directly can backfire if the increased Aggro he receives causes him to take enough attacks to break through her shield regardless. March also generally uses more Skill Points than Fire Trailblazer, so you’ll want to pair her with other units that Basic ATK often to compensate. |
Himeko
Himeko is one of the 5★ characters available for the Departure Warp in Honkai: Star Rail. She deals Fire damage and belongs to the Erudition Path.
| Fire is a damage-oriented Element that does a high amount of damage upon Weakness Break. The Burn effect lasts for two turns and does one instance of Fire damage per turn. It is not affected by enemy type. |
| Path of Erudition: These characters focus on high multi-target damage. They function best as the main damage dealer against groups of enemies. |
How to Play
Himeko is a Fire damage dealer that deals high amounts of damage to enemies, particularly in multi-target/AoE situations.
Himeko’s kit focuses on providing great AoE damage, and she is quite lackluster when dealing with single-target focused content. It is heavily recommended that you bring a dedicated single-target damage dealer with her to offset this weakness, and have a more flexible team against challenging content.
Himeko’s talent, an AoE follow up attack, is activated after any 3 normal enemies, or one elite enemy, is weakness broken from any source. Her talent has no cooldown, but it can overstack. If you are crowd controlled (frozen/imprisoned), and you get 6 or more stacks, it will not cast twice, and only cast once. Generally, you want to weakness-break as often as possible on multiple enemies for Himeko to deal good consistent chip damage with her follow up and set up for your single-target damage dealer to execute the damaged enemies.
Light Cones
In the early game, gearing with specific Light Cones and Relics is not necessary to progress. KQM will update this section as soon as we are able to confidently offer accurate rankings and evaluations.
| Night on the Milky Way is Himeko’s signature 5★ Light Cone and can be obtained from the Stellar Warp, as a non-rate up on the Light Cone Event Warp, or in the Starlight Exchange for 600 Starlight. Light Cone Ability: Meteor Swarm For every enemy on the field, increases the wearer’s ATK by 9.0%, up to 5 stacks. When an enemy is inflicted with Weakness Break, the DMG dealt by the wearer increases by 30% for 1 turn. |
| Before Dawn is Jing Yuan’s signature 5★ Light Cone and can be obtained from the Light Cone Event Warp. Light Cone Ability: Long Night Increases the wearer’s CRIT DMG by 36%. Increases the wearer’s Skill and Ultimate DMG by 18%. After the wearer uses their Skill or Ultimate, they gain Somnus Corpus. Upon triggering a follow-up attack, Somnus Corpus will be consumed and the follow-up attack DMG increases by 48%. |
| Today is Another Peaceful Day is a Nameless Honor exclusive 4★ Light Cone. Light Cone Ability: A Storm is Coming After entering battle, increases the wearer’s DMG based on their max energy. Damage increases by 0.20% per point of Energy, up to 160 Energy. |
 | Make the World Clamor is Warp exclusive 4★ Light Cone. This Light Cone can also be obtained from the All-Stars Invite web event until 24 May 2023. Light Cone Ability: The Power of Sound The wearer regenerates 20 Energy immediately upon entering battle, and increases Ultimate DMG by 32%. |
| The Seriousness of Breakfast is a 4★ Light Cone that can be obtained from the weekly Echoes of War or purchased from the Light Cone Manifest from the Messenger in the Parlor Car. Light Cone Ability: Get Ready Increases the wearer’s DMG by 12%. For every defeated enemy, the wearer’s ATK increases by 4%, stacking up to 3 time(s). |
 | Genius’ Repose is a Warp exclusive 4★ Light Cone. Light Cone Ability: Each Now Has a Role to Play Increases the wearer’s ATK by 16%. When the wearer defeats an enemy, the wearer’s CRIT DMG increases by 24% for 3 turn(s). |
Relics
In the early game, gearing with specific Relics and Planar Ornament sets is not necessary to progress. KQM will update this section as soon as we are able to confidently offer accurate rankings and evaluations.
Himeko appreciates the Firesmith of Lava-Forging set for the DMG%. She can also use the ATK% from Musketeer of Wild Wheat.
Inert Salsotto provides Himeko with additional CRIT Rate. If she has 50% or more CRIT Rate, it will also give her extra DMG% for her follow-up attacks and her Ultimate.
Relic
 | Firesmith of Lava-Forging is a Relic set located in Xianzhou Luofu: Stargazer Navalia. It can also be obtained by completing the An Eye for an Eye Adventure Mission in the Silvermane Guard Restricted Zone. Relic Set Effect: 2pc: Increases Fire DMG by 10%. 4pc: Increases the wearer’s Skill DMG by 12%. After unleashing Ultimate, increases the wearer’s Fire DMG by 12% for the next attack. |
| Musketeer of Wild Wheat is a Relic set located in Jarilo-VI: Corridor of Fading Echoes. It can also be obtained in Echoes of War and by spending Hertareum at the Internal Purchase Officer in Herta Space Station: Master Control Zone. Relic Set Effect: 2pc: ATK increases by 12%. 4pc: The wearer’s SPD increases by 6% and Basic ATK DMG increases by 10%. |
Planar Ornaments
| Inert Salsotto is a Planar Ornament set located in Simulated Universe: World 6. Planar Ornament Set Effect: 2pc: Increases the wearer’s CRIT Rate by 8%. When the wearer’s current CRIT Rate reaches 50% or higher, the wearer’s Ultimate and follow-up attack DMG increases by 15%. |
Teambuilding
Himeko functions best in teams as an AoE damage dealer providing supporting damage to a single-target damage dealer such as Seele, Sushang, and Dan Heng. She provides strong chip damage to foes, allowing them to more easily confirm kills. Buffers and debuffers such as Tingyun, Asta, and Pela are also recommended to bring along as they increase the overall team damage. A defensive option such as Natasha or Bailu is strongly recommended to keep Himeko and the rest of the team alive.
Potential Damage Dealer Options
| Seele is a high-end single-target damage dealer option that pairs well with Himeko. Himeko provides high multi-target damage, allowing Seele to more easily get her resets and confirm kills, as well as helping to deal with Bosses. | |
| Sushang is another strong single-target damage dealer who also appreciates inflicting Weakness Break on enemies as it provides her with SPD and action buffs. Can run into Elemental diversity issues if run alongside Natasha. | |
| Dan Heng is the F2P single-target damage dealer. He provides the team with Wind Element coverage as well as strong single-target damage contribution. |
Potential Support Options
| Tingyun provides an ATK bonus on her Skill and a DMG buff on her Ultimate as well as generate 50 Energy for Himeko’s Ultimate. This allows Himeko to deal more damage and use her Ultimate more frequently. | |
| Asta is a free option that can provide a variable ATK bonus and a Speed bonus for Himeko, while also helping to break Toughness efficiently. However, do note that Himeko and Asta share the Fire Element, reducing Elemental diversity which might not be ideal in some matchups. | |
| Pela provides AoE enemy DEF reduction through her Ultimate, as well as the ability to remove one Buff from an enemy through her Skill. She provides some damage as well as Ice Elemental coverage. | |
| Silver Wolf is often a great option for single-target situations due to her DEF reduction and Elemental Weakness implant. This allows for more Weakness Breaks and damage dealt, and can allow certain Elements to thrive when they are usually not favored. |
Bailu
Bailu is one of the 5★ characters available from the Departure Warp in Honkai: Star Rail. She deals Lightning damage and belongs to the Abundance Path.
| Lightning is a damage-oriented Element that does a low amount of damage upon Weakness Break. The Shock effect lasts for two turns and does one instance of Lightning damage per turn. It is not affected by enemy type. |
| Path of Abundance: These characters heal allies and restore HP to the team. |
How to Play
Bailu is an Abundance Path Lightning character that provides the party with both strong single-target and multi-target healing, as well as extra survivability through a one-time-per-battle revive.
Her Skill heals a targeted ally for an amount scaling off of Bailu’s Max HP before healing random allies 2 times after, meaning she can heal a single ally up to 3 times or multiple allies on the team depending on how the Skill rolls. Bailu’s Ultimate heals all allies for a large chunk of her Max HP, and applies Invigoration to all allies affected for 1 turn, or extending its duration for those already under its effect, up to a maximum of 2 stacks. Her Talent provides healing to allies under the effect of Invigoration, restoring a small amount of HP after the unit is hit, up to 2 times per turn (3 with her Ascension 4 Trace). Her Talent also provides the team with a one time revive once an ally’s HP hits 0 (excluding Bailu) once per battle and restores a chunk of health based on Bailu’s Max HP.
Light Cones
In the early game, gearing with specific Light Cones and Relics is not necessary to progress. KQM will update this section as soon as we are able to confidently offer accurate rankings and evaluations.
 | Time Waits for No One is Bailu’s signature Light Cone 5★ Light Cone and can be obtained on the Stellar Warp, as a non-rate up on the Light Cone Event Warp, or in the Starlight Exchange for 600 Starlight. Light Cone Ability: Morn, Noon, Dusk, and Night Increases the wearer’s Max HP by 18% and Outgoing Healing by 12%. When the wearer heals allies, record the amount of Outgoing Healing. When any ally launches an attack, a random attacked enemy takes Additional DMG equal to 36% of the recorded Outgoing Healing value. This Additional DMG is of the same Type as the wearer’s, is not affected by other buffs, and can only occur 1 time per turn. |
| Post-Op Conversation is a Warp exclusive 4★ Light Cone. Light Cone Ability: Mutual Healing Increases the wearer’s Energy Regeneration Rate by 8% and increases Outgoing Healing when they use their Ultimate by 12%. |
| Shared Feeling is a Warp exclusive 4★ Light Cone. Light Cone Ability: Cure and Repair Increases the wearer’s Outgoing Healing by 10%. When using Skill, regenerates 2 Energy for all allies. |
| Quid Pro Quo is a 4★ Light Cone that can be obtained from the weekly Echoes of War or purchased from the Light Cone Manifest from the Messenger in the Parlor Car. Light Cone Ability: Enjoy with Rapture At the start of the wearer’s turn, regenerates 8 Energy for a randomly chosen ally (excluding the wearer) whose current Energy is lower than 50%. |
| Warmth Shortens Cold Nights is a Nameless Honor exclusive 4★ Light Cone. Light Cone Ability: Tiny Light Increases the wearer’s Max HP by 16%. When using Basic ATK or Skill, restores all allies’ HP by an amount equal to 2.0% of their respective Max HP. |
 | Cornucopia is a Warp exclusive 3★ Light Cone. Light Cone Ability: Prosperity When the wearer uses their Skill or Ultimate, their Outgoing Healing increases by 12%. |
Relics
In the early game, gearing with specific Relics and Planar Ornament sets is not necessary to progress. KQM will update this section as soon as we are able to confidently offer accurate rankings and evaluations.
Bailu appreciates the Outgoing Healing Boost from the Passerby of Wandering Cloud set. This set also gives her team an extra Skill Point at the start of a battle.
Fleet of the Ageless gives ATK% to the entire party while also increasing Bailu’s healing.
Relic
| Passerby of Wandering Cloud is a Relic set located in Jarilo-VI: Corridor of Fading Echoes. It can also be obtained when Trailblazers reach level 26–27 and by completing Operation Briefing (Part 3). Relic Set Effect: 2pc: Increases Outgoing Healing by 10%. 4pc: At the start of the battle, immediately regenerates 1 Skill Point. |
Planar Ornaments
| Fleet of the Ageless is a Planar Ornament set located in Simulated Universe: World 3. Planar Ornament Set Effect: 2pc: Increases the wearer’s Max HP by 12%. When the wearer’s SPD reaches 120 or higher, all allies’ ATK increases by 8%. |
Teambuilding
Bailu is a strong, flexible support that can work in a multitude of teams that require a healing option. Note that Bailu’s kit provides no form of debuff cleansing so in cases where cleanse is needed, Natasha, Luocha, and March 7th are strong options in her stead. She may even be paired with March 7th in harder content where the added survivability is necessary.
Gepard
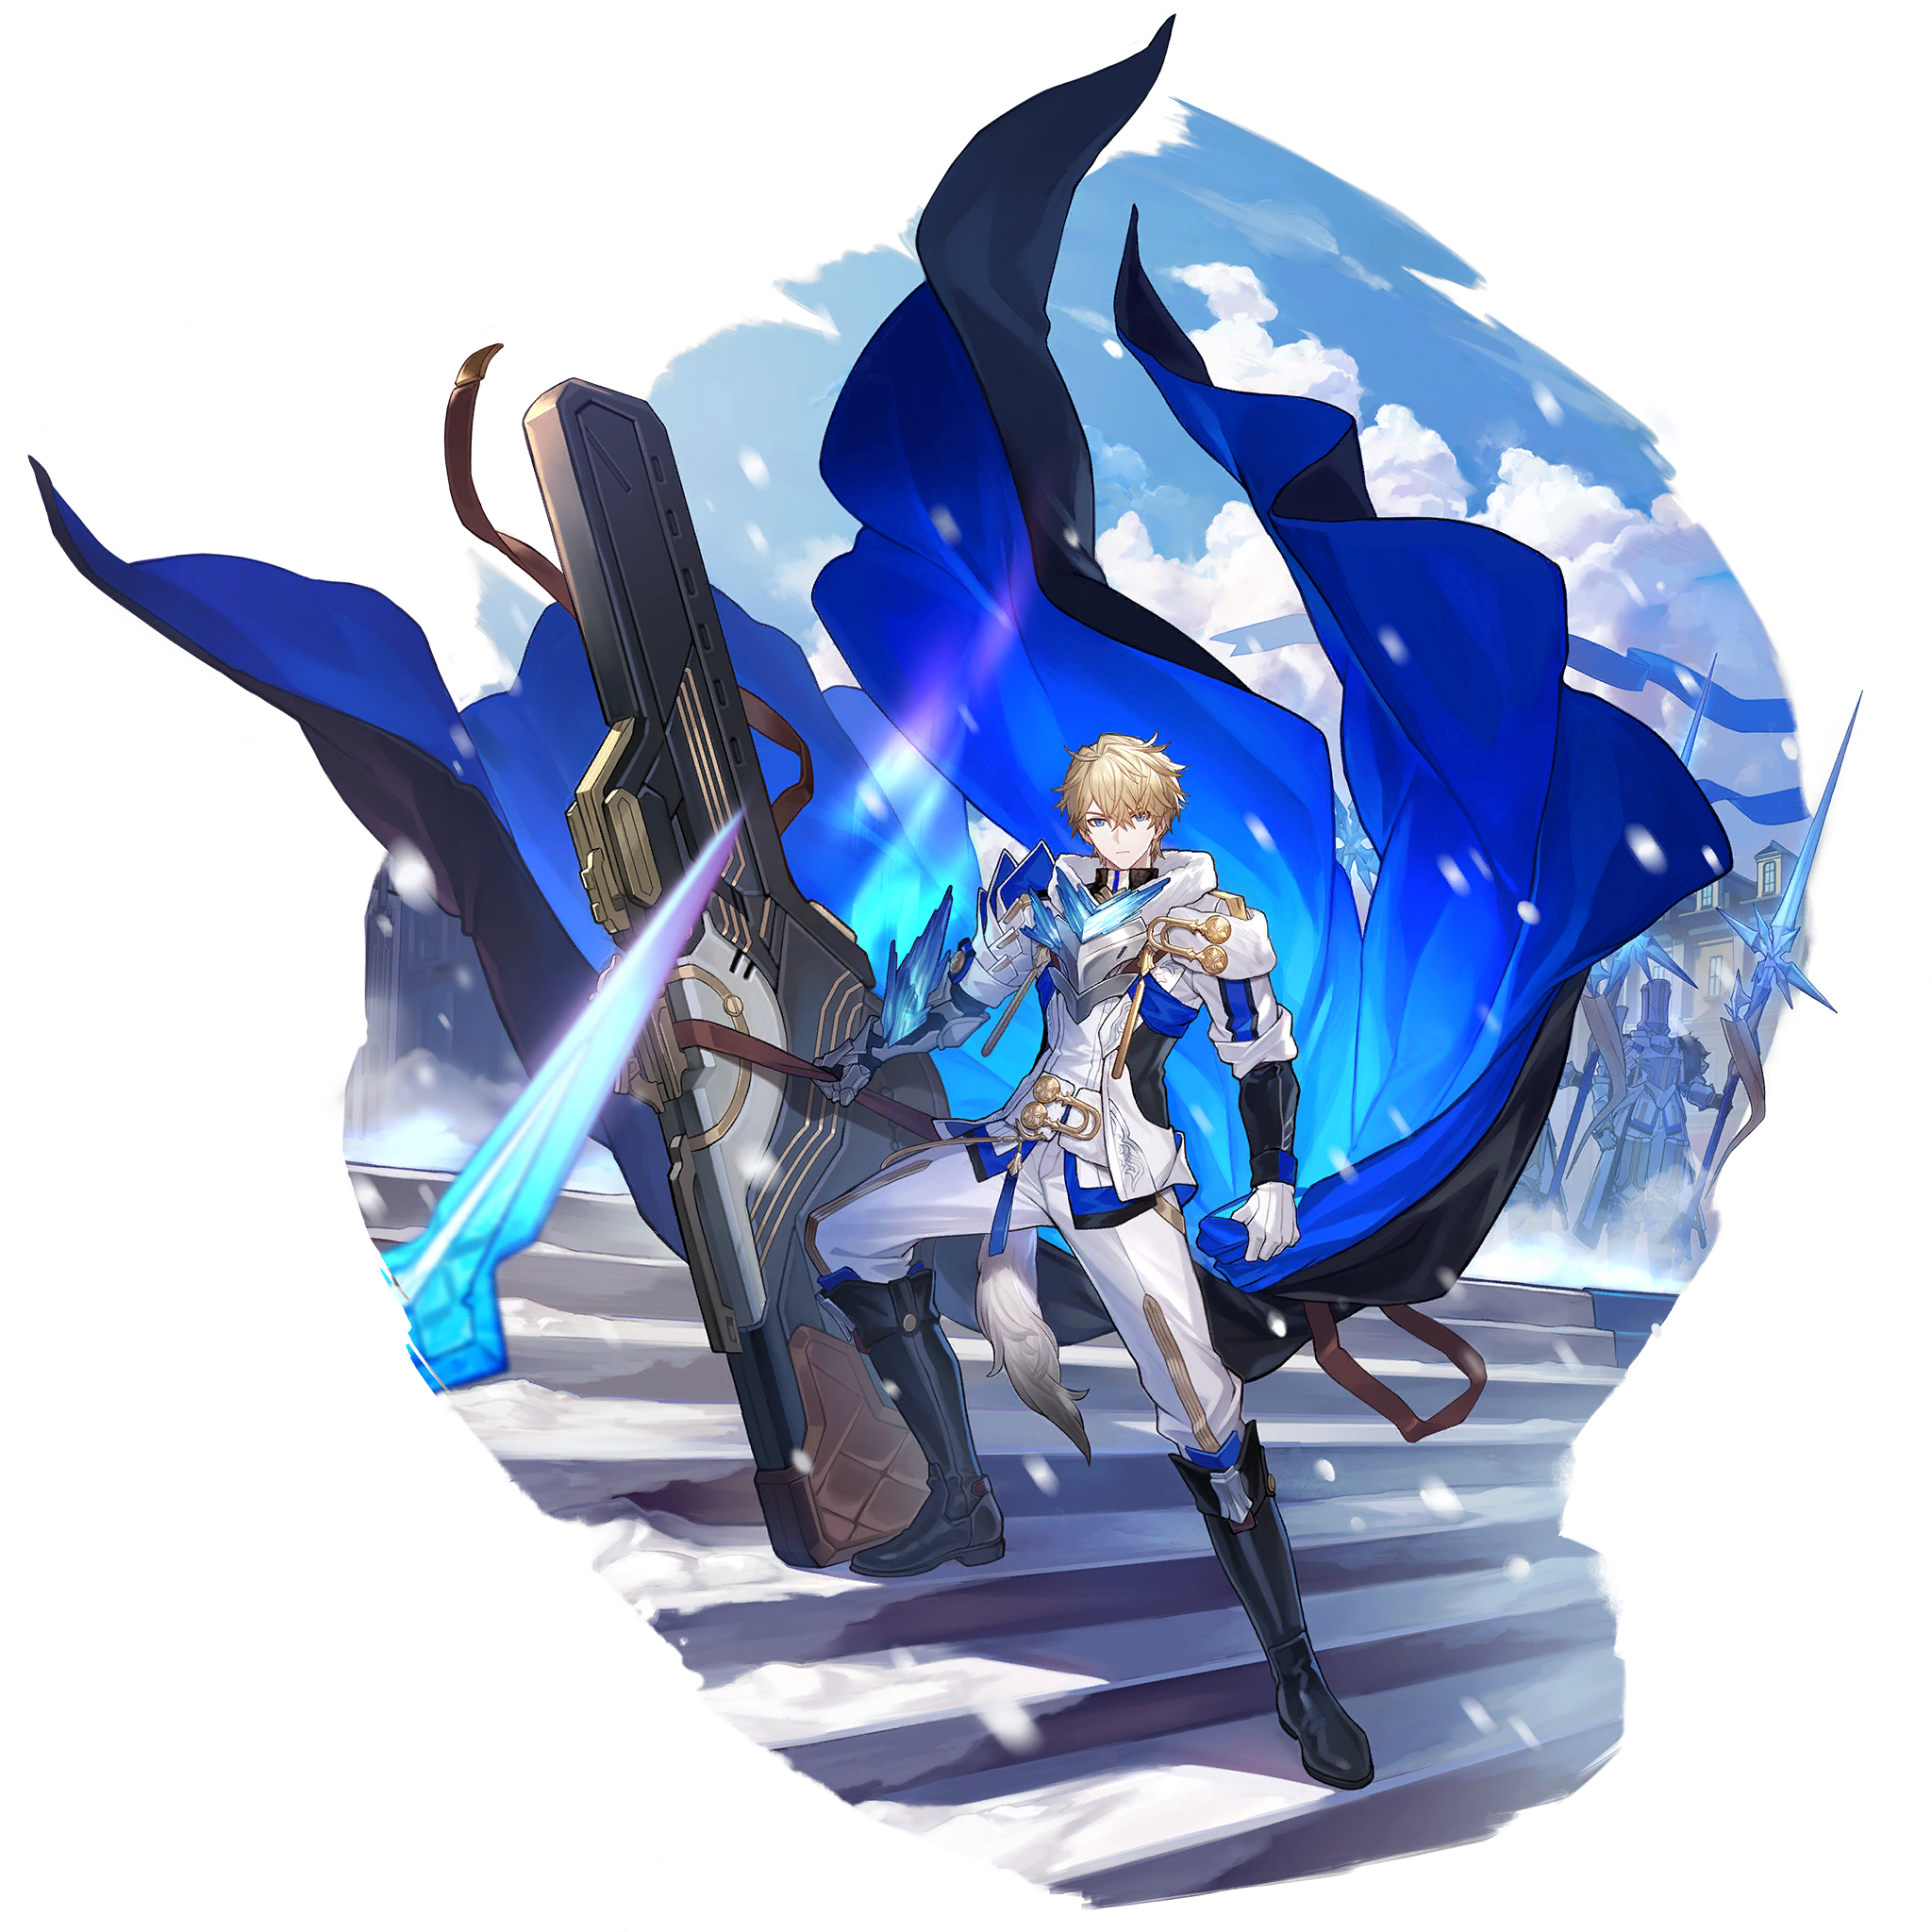
Gepard is one of the 5★ characters available from the Departure Warp in Honkai: Star Rail. He deals Ice damage and belongs to the Preservation Path.
| Ice provides a mix of crowd control and damage. The Freeze effect lasts until the enemy’s next turn. When that enemy’s next turn begins, the Freeze effect expires, dealing damage and preventing the enemy from taking action on that turn as well delaying their next action by 50%. |
| Path of Preservation: These characters possess powerful defensive abilities that protect their allies. |
How to Play
Gepard is a defensive Ice support, specializing in party-wide shields through his Ultimate, and passively drawing enemy Aggro onto himself, protecting his allies. He is very durable, and has a once-per-battle self revive.
The focal point is his Ultimate. It applies strong and long-lasting shields to the entire party, lasting for 3 turns. As this is an Ultimate, Gepard can use this to interject during enemy actions, having the potential to shield the party in-between enemy turns. Because he has a below-average Energy cost, and has a permanently active higher chance to be attacked by enemies thanks to his A2, Gepard tends to recover his Energy more quickly when compared to other characters.
His skill targets a single enemy and has a 65% base chance to freeze that enemy, affording him access to some valuable crowd-control. His talent will let him revive himself once per battle, and can also fully restore his Energy with his A4 when triggered, and later on, his A6 allows him to convert 35% of his current DEF stat into bonus ATK, letting him deal non-negligible damage as well.
Because his primary utility of providing shields is tied to his ultimate, Gepard rarely needs to pull from your team’s Skill Point reserves, and can spend most of his time replenishing those reserves by Basic ATKing. If you need to prevent an enemy from acting, you can attempt to freeze them with Gepard’s skill, or alternatively use his skill more actively if you wish to regain Energy faster.
Light Cones
In the early game, gearing with specific Light Cones and Relics is not necessary to progress. KQM will update this section as soon as we are able to confidently offer accurate rankings and evaluations.
| Moment of Victory is Gepard’s signature Light Cone 5★ and can be obtained on the Stellar Warp, as a non-rate up on the Light Cone Event Warp, or in the Starlight Exchange for 600 Starlight. Light Cone Ability: Verdict Increases the wearer’s DEF by 24% and Effect Hit Rate by 24%. Increases the chance for the wearer to be attacked by enemies. When the wearer is attacked, increase their DEF by an extra 24% until the end of the wearer’s turn. |
| Landau’s Choice is a Warp exclusive 4★ Light Cone. Light Cone Ability: Time Fleets Away The wearer is more likely to be attacked, but DMG taken is reduced by 16%. |
| Trend of Universal Market is a Warp exclusive 4★ Light Cone. Light Cone Ability: A New Round of Shuffling Increases the wearer’s DEF by 16%. When the wearer is attacked, there is a 100% base chance to Burn the enemy. For each turn, the wearer deals DoT that is equal to 40% of the wearer’s DEF for 2 turn(s). |
| We Are Wildfire is a 4★ Light Cone that can be obtained from the weekly Echoes of War or purchased from the Light Cone Manifest from the Messenger in the Parlor Car. Light Cone Ability: Teary-Eyed At the start of the battle, the DMG dealt to all allies decreases by 8% for 5 turn(s). At the same time, immediately restores HP to all allies equal to 30% of the respective HP difference between the characters’ Max HP and current HP. |
| Day One of My New Life is a Warp exclusive 4★ Light Cone. Light Cone Ability: At This Very Moment Increases the wearer’s DEF by 16%. After entering battle, increases DMG RES of all allies by 8%. Effects of the same type cannot stack. |
Relics
In the early game, gearing with specific Relics and Planar Ornament sets is not necessary to progress. KQM will update this section as soon as we are able to confidently offer accurate rankings and evaluations.
Gepard appreciates the DEF% and increased shield strength provided by the Knight of Purity Palace set. Another option is Guard of Wuthering Snow, which reduces the amount of damage he takes, increasing his shield strength indirectly.
Belobog of the Architects can be used for the additional DEF%, and reaching 50% Effect Hit Rate means his Skill will be more likely to Freeze enemies. Alternatively, Fleet of the Ageless is a more offensive choice, buffing the entire team by providing ATK%.
Relic
| Knight of Purity Palace is a Relic set located in Xianzhou Luofu: Cloudford. It can also be obtained when Trailblazers reach level 17, 32-35, 44, and 47. Relic Set Effect: 2pc: Increase DEF% by 15%. 4pc: Increases the max DMG that can be absorbed by the Shield created by the wearer by 20%. |
| Guard of Wuthering Snow is a Relic set located in Jarilo-VI: Everwinter Hill. Relic Set Effect: 2pc: Reduces DMG taken by 8%. 4pc: At the beginning of the turn, if the wearer’s HP is equal to or less than 50%, restores HP equal to 8% of their Max HP and regenerates 5 Energy. |
Planar Ornaments
| Belobog of the Architects is a Planar Ornament set located in Simulated Universe: World 6. Planar Ornament Set Effect: 2pc: Increases the wearer’s DEF by 15%. When the wearer’s Effect Hit Rate is 50% or higher, the wearer gains an extra 15% DEF. |
| Fleet of the Ageless is a Planar Ornament set located in Simulated Universe: World 3. Planar Ornament Set Effect: 2pc: Increases the wearer’s Max HP by 12%. When the wearer’s SPD reaches 120 or higher, all allies’ ATK increases by 8%. |
Teambuilding
Gepard is widely applicable in team comps that require a shielder or defensive support. He especially complements teams with very Skill Point hungry characters, as his shields come from his Ultimate. Additionally, due to having a self-revive, you can afford to let him take more damage than other characters, potentially saving on Healer Skill Point usage.
Do note, Gepard does not have any form of Cleanse in his kit, nor does he have a direct Taunt to force enemies to attack him. While he is always more likely to be attacked by enemies, he cannot circumvent enemy lock-ons. If this is an issue, Fire Trailblazer may be a better alternative.
Credits
Alreph
Artesians
CaptanCrunch
Cyn
ducc
Eris
Feito
KB
Leifa
Monochrom9
nyte
Reens
Sitri
Sushou
tunasaladx
Changelog
- 6 May 2023 – Published for v1.0
- 18 July 2023 – v1.1 Update: Rewrote sections, added Relics, added Luocha, Silver Wolf, Jing Yuan, Physical Trailblazer, and Fire Trailblazer.