
Updated for Version 1.3
Note that the information given may change if new discoveries are made. More extensive testing is in progress.
Join our Discord to check on and participate in the theorycrafting process.
Table of Contents
Introduction
Arlan is a 4★ Lightning Destruction character available since the initial release of Honkai: Star Rail. Focused on high-risk, high-reward gameplay, Arlan punches above his weight class, competing with limited characters for damage output in both single-target and AoE scenarios without needing Skill Points. Power comes at a price however, and Arlan’s many advantages come with just as many caveats, first of which is the mandatory use of a strong Preservation character to prevent his death.
For the player who is comfortable with paying a price for power, Arlan is a strong addition to many lineups with his potent mix of single-target and AoE damage output.
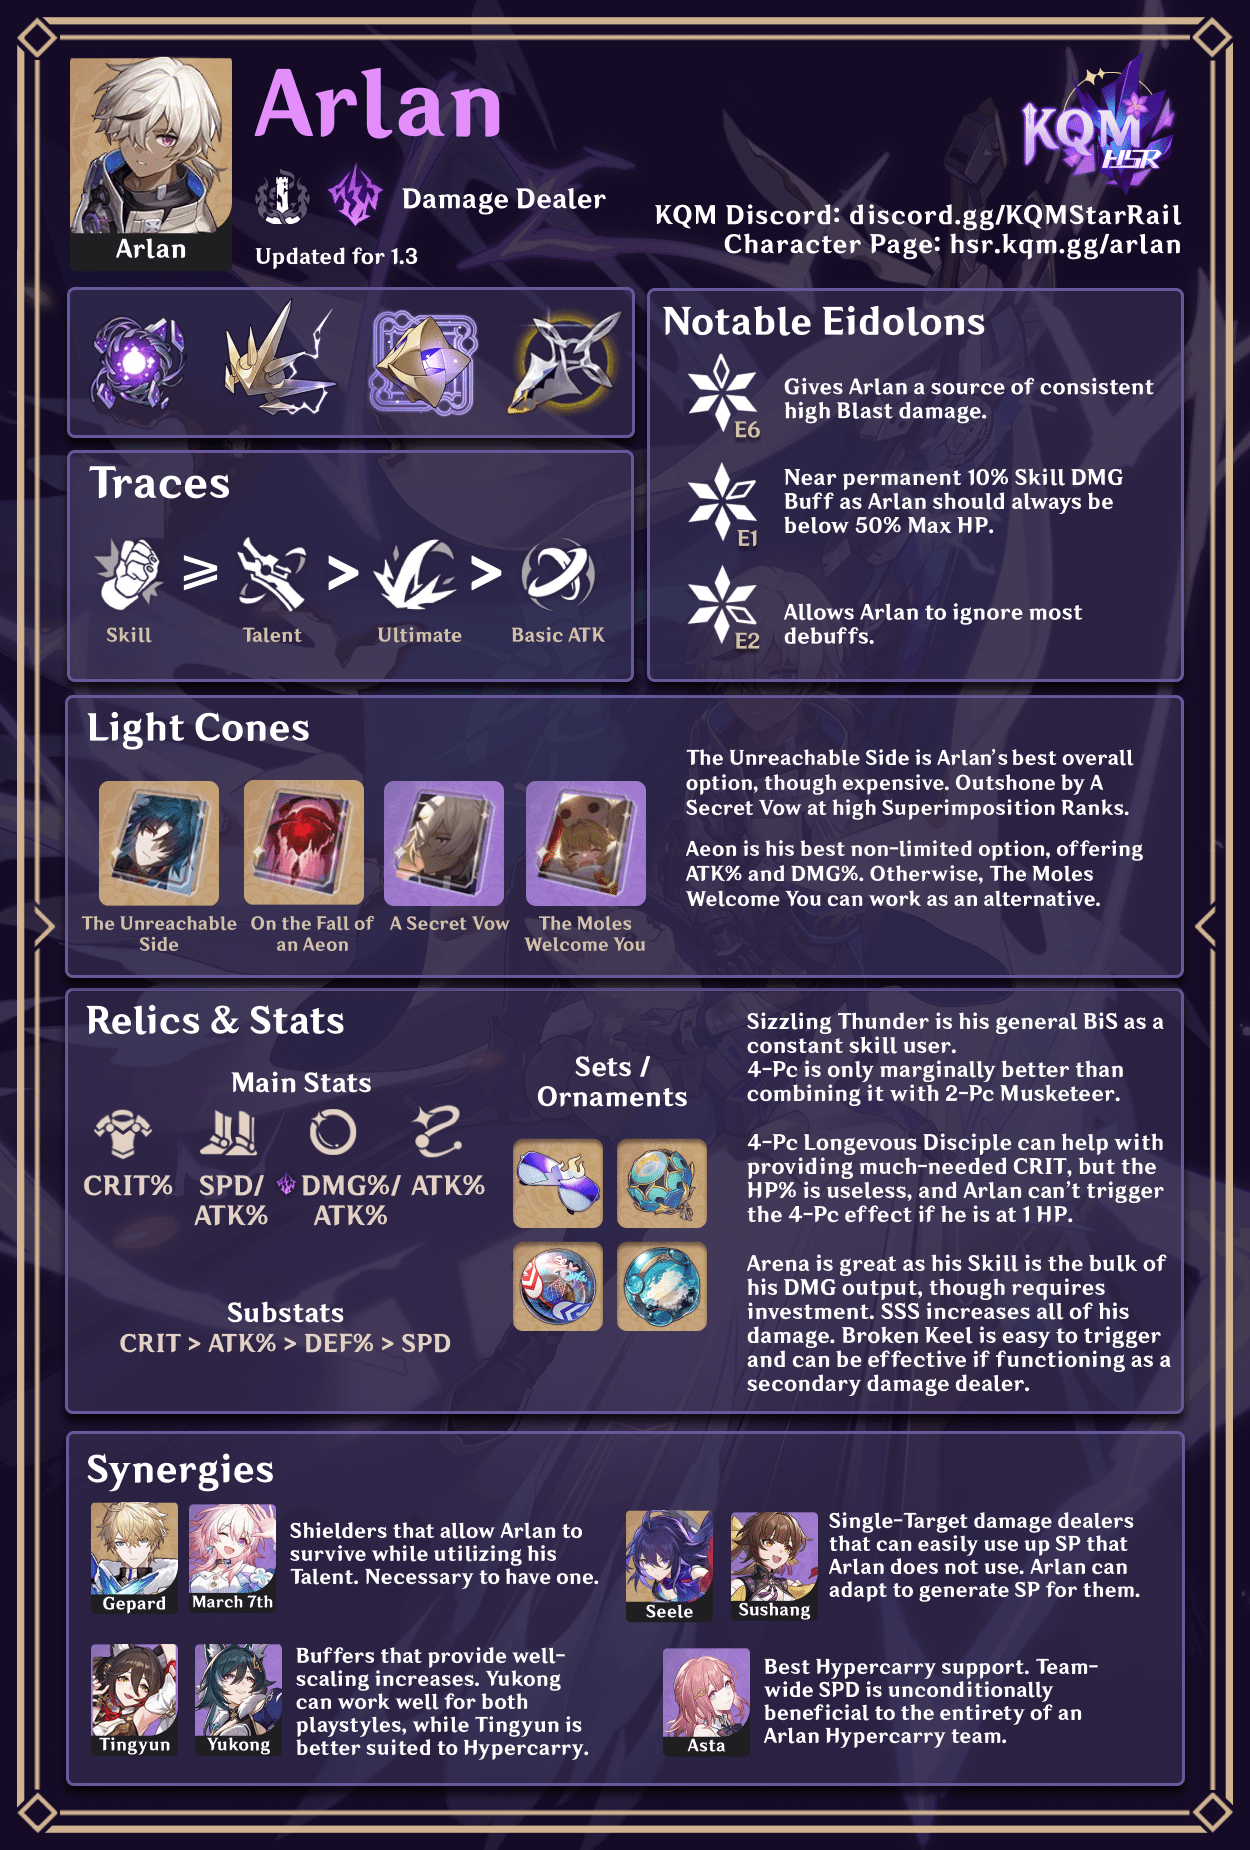
Infographic
Mechanics
Arlan’s Skill, Shackle Breaker, does not consume Skill Points, and instead devours 15% of his Max HP with each use. Even if Arlan is on his last point of HP, Shackle Breaker will leave him at 1 HP. While dangerous, Shackle Breaker’s self damage only serves to fuel Arlan’s Talent, Pain and Anger, which grants Arlan increasing DMG% as his HP lowers. Once he reaches 1 HP, Pain and Anger reaches its full potential, granting Arlan one of the largest DMG% bonuses in all of Honkai: Star Rail.
While Arlan cannot spend Skill Points, he can generate them with his Basic ATK, Lightning Rush. As his Basic ATK still benefits from his Talent, it still manages to hit quite hard, allowing Arlan to generate SP in response to unexpected problems.
Arlan outright requires shielding from Preservation characters in order to function. No matter how durable Arlan is built, he will inevitably reach 1 HP through repeated uses of his Skill. Without a Shield, this leaves him one hit from death.
Trace Priority
 ≥
≥  >
>  >
> 
Skill ≥ Talent > Ultimate > Basic ATK
Traces
Basic ATK | Lightning Rush
Trace Description
Lightning Rush [Single Target]
Deals Lightning DMG equal to 50%/100%/110% of Arlan’s ATK to a single enemy.
A standard, ATK-scaling Basic ATK. Note that this is also buffed by Arlan’s Talent, Pain and Anger.
Skill | Shackle Breaker
Trace Description
Shackle Breaker [Single Target]
Consumes Arlan’s HP equal to 15% of his Max HP to deal Lightning DMG equal to 120%/240%/264% of Arlan’s ATK to a single enemy. If Arlan does not have sufficient HP, his HP will be reduced to 1 after using his Skill.
Expends up to 15% Max HP instead of a Skill Point. Has a very high ATK% ratio and increases the bonus granted by Pain and Anger before dealing damage. Will never cause Arlan to be knocked down.
Ultimate | Frenzied Punishment
Trace Description
Frenzied Punishment [Blast]
Deals Lightning DMG equal to 192%/320%/345% of Arlan’s ATK to a single enemy and Lightning DMG equal to 96%/160%/172% of Arlan’s ATK to enemies adjacent to it.
A standard Blast Ultimate that deals full damage to the primary target and half damage to adjacent targets. Relatively inexpensive at 110 Energy.
Talent | Pain and Anger
Trace Description
Pain and Anger [Enhance]
Increases Arlan’s DMG for every percent of HP below his Max HP, up to a max of 36%/72%/79% more DMG.
Grants increasing DMG% as Arlan’s HP drops, increasing linearly with each point of HP lost.
 Technique | Swift Harvest
Trace Description
Swift Harvest
Immediately attacks the enemy. After entering battle, deals Lightning DMG equal to 80% of Arlan’s ATK to all enemies.
A standard damaging Technique. Becomes better at low HP, as it benefits from Pain and Anger.
 Ascension 2 Bonus Ability | Revival
Trace Description
Revival
If the current HP percentage is 30% or lower when defeating an enemy, immediately restores HP equal to 20% of Max HP.
Recovering 20% of Arlan’s Max HP when he kills an enemy can prevent any unwanted accidents when a new wave of enemies comes in, or simply help Arlan take hits at the start of the next battle.
 Ascension 4 Bonus Ability | Endurance
Trace Description
Endurance
The chance to resist DoT Debuffs increases by 50%.
Many enemies rely heavily on DoT debuffs to deal damage or trigger other mechanics. Arlan’s heightened resistance can often leave him exempt from fight mechanics and able to focus on dealing damage.
 Ascension 6 Bonus Ability | Repel
Trace Description
Repel
Upon entering battle, if Arlan’s HP is less than or equal to 50%, he can nullify all DMG received except for DoT until after he is attacked.
A useful utility passive, granting Arlan increased resistance against accidental death before he has been shielded.
Note: Trace levels shown are 1/10/12 (Basic ATK 1/6/7).
Bonus Ability Priority
> >
A4 > A6 > A2
Eidolons
 Eidolon 1 | To the Bitter End
When HP is lower than or equal to 50% of Max HP, increases Skill’s DMG by 10%.
An additional 10% Skill DMG isn’t particularly impactful with how much DMG% Arlan already gets, but still increases his damage output. Additive with other sources of DMG% such as Pain and Anger.
 Eidolon 2 | Breaking Free
Using Skill or Ultimate removes 1 debuff from oneself.
Control debuffs prevent the activation of Breaking Free, ironically making this Eidolon very poor at breaking free of Control effects. With Arlan’s DoT resistance, Breaking Free is often most useful for removing stat reductions or bans, such as those inflicted by the Guardian Shadow.
 Eidolon 3 | Power Through
Skill Lv. +2, up to a maximum of Lv. 15.
Basic ATK Lv. +1, up to a maximum of Lv. 10.
Increasing the level of Arlan’s Skill is very impactful. The extra Basic ATK level can occasionally be helpful as well.
 Eidolon 4 | Turn the Tables
When struck by a killing blow after entering battle, instead of becoming knocked down, Arlan immediately restores his HP to 25% of his Max HP. This effect is automatically removed after it is triggered once or after 2 turn(s) have elapsed.
When combined with DoT resistance from his A4, Arlan becomes extremely difficult to knock down in the early stages of combat, which alleviates his greatest weakness.
 Eidolon 5 | Hammer and Tongs
Ultimate Lv. +2, up to a maximum of Lv. 15.
Talent Lv. +2, up to a maximum of Lv. 15.
Increasing the damage of Arlan’s Ultimate is nice. The extra DMG% given to Pain and Anger is only 7%, making this less impactful than it first appears.
 Eidolon 6 | Self-Sacrifice
When HP drops to 50% or below, Ultimate deals 20% more DMG. The DMG multiplier of DMG taken by the target enemy now applies to adjacent enemies as well.
Doubling the splash damage dealt by Arlan’s Ultimate gives Arlan one of the strongest tools in the game for quickly wiping out groups of enemies. When combined with the Talent level boost from E5, this can give Arlan as much as a 345% damage Ultimate that strikes three foes with up to 79% DMG from Pain and Anger, which devastates enemies.
Arlan’s Ultimate becomes one of the largest sources of hilariously overinflated damage numbers, with a ratio of 1035% ATK at level 12 when it hits three targets.
Playstyle
Secondary Damage Dealer
Arlan is at his best when paired with another damage dealer, such as Seele or Yanqing. With his ability to generate SP through Basic ATKs while dealing hefty damage without expending SP with his Skill, Arlan can significantly increase the damage output of a team without causing any issues with its rotation or SP consumption.
If Seele activates Resurgence or Qingque expends too much SP on her enhanced Basic ATK, Arlan can balance the team’s SP expenses by using his Basic ATK. Besides raw damage, this flexibility is his main selling point, and allows you to react to events more effectively than other secondary damage dealers.
Hypercarry
Arlan’s inability to use SP allows him to run a more SP-intensive set of supports and defensive characters than other damage dealers. When run in this way, Arlan favors characters who grant buffs other than DMG%, like Asta and Yukong, and they should be built to take full advantage of the extra SP they will have available. While it is unlikely that Hypercarry Arlan will overtake limited Event Warp damage dealers in effectiveness, Arlan is a 4-Star character and the majority of his best teammates are freely available, which makes Arlan teams cheap to build.
Do not use Bronya for Hypercarry Arlan. With no other target for her Skill, you will accelerate how fast shields expire on Arlan, making him far more vulnerable.
Build
Relics
Relic Sets
 4-Pc Band of Sizzling Thunder | One of Arlan’s best sets, being designed around Lightning-Type damage dealers who use their Skill constantly. Activating its 4-Pc Set Effect is effortless given that Arlan does not require SP to use his Skill. Only marginally better than 2-Pc Band/2-Pc Musketeer. |
 4-Pc Longevous Disciple | While the 2-Pc effect of Longevous Disciple is useless to Arlan, the 4-Pc effect of 16% CRIT Rate is extremely useful for him as he can struggle to get enough CRIT. |
 4-Pc Guard of Wuthering Snow | Acting as both an offensive and a defensive set for Arlan, Guard of Wuthering Snow enables Arlan to not only take less damage, but also use his Ultimate every three turns instead of every four turns. The healing from Guard of Wuthering Snow will delay reaching maximum damage as the heal pushes against the damage dealt from Shackle Breaker. |
 2-Pc Band of Sizzling Thunder + 2-Pc Musketeer of Wild Wheat | Combining Musketeer of Wild Wheat with Band of Sizzling Thunder results in a loss of 8% ATK, or roughly two substats. As all accounts essentially get Musketeer for free from Echoes of War, it can be better to run 2-Pc Thunder and 2-Pc Musketeer if your substats are better. |
Planar Ornaments
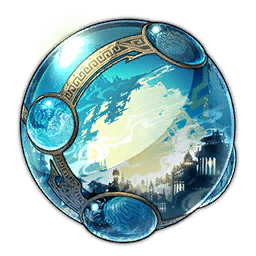
 Rutilant Arena | Arlan’s Skill makes up the bulk of his damage output, and another 20% DMG is helpful for ensuring he deals as much damage as possible. The 8% CRIT Rate is another helpful bonus, as Arlan’s kit does not give him any inherent bonuses to CRIT. Just be aware that 70% CRIT Rate can be difficult to reach. |
 Space Sealing Station | Space Sealing Station grants Arlan an additional 24% ATK, helping to balance out Pain and Anger’s large DMG% bonus. The 120 SPD threshold is easy for Arlan to reach with SPD boots, and possible through substats. |
 Broken Keel | Arlan only needs a single Effect RES substat on any Relic in order to activate the effect of Broken Keel. While 10% CRIT DMG isn’t as strong of a buff to Arlan himself, it will increase team damage at minimal opportunity cost. Strong when Arlan is paired with another damage dealer. |
Light Cones
 The Unreachable Side | While Arlan has little use for HP%, the CRIT Rate and DMG% given by The Unreachable Side is extremely valuable for Arlan. Rutilant Arena becomes much easier to run with a CRIT DMG Body when using The Unreachable Side. Expensive, but Arlan’s best overall Light Cone unless Secret Vow is at a high Superimposition Rank. |
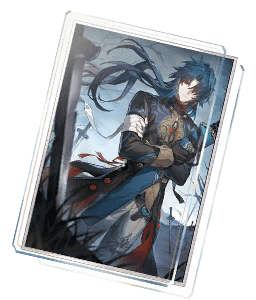
 On the Fall of an Aeon | Arlan heavily favors gaining additional ATK%, and On the Fall of an Aeon offers additional ATK% as well as conditional DMG%. Currently Arlan’s best non-limited Light Cone in teams without multiple large ATK% buffs to balance out Arlan’s inherent DMG%. |
 A Secret Vow | A Secret Vow’s condition is easy for Arlan to achieve due to Arlan’s constant self damage. The astronomical DMG% bonus available at high Superimpositions makes this Arlan’s Best-in-Slot in teams where Arlan can expect to get large amounts of ATK% from teammates. Arlan’s best Light Cone at high Superimposition Ranks. |
 The Moles Welcome You | The 4-Star version of On the Fall of an Aeon, and a viable alternative should it be unavailable for whatever reason. To maximize its effect, Arlan must Basic ATK at least once per battle. |
 Mutual Demise | The early game option for Arlan. Mutual Demise will almost always have its bonus active when used by Arlan. Arlan highly values DEF, and Mutual Demise can leave Arlan overly prone to dying through his Shields. Upgrading from a 3-Star Light Cone to one with higher base stats is important. |
Stats
 Body |  Feet |  Sphere |  Rope |
| CRIT Rate% or CRIT DMG% | SPD or ATK% | Lightning DMG% or ATK% | ATK% or Energy Regeneration Rate% |
Substat Priority:
CRIT > ATK% > DEF% > SPD
DO NOT BUILD HP%
SPD
Arlan should aim to be slightly faster than your Preservation character and nothing more. Additional SPD beyond being at +1 SPD over his source of Shields is wasteful at best and dangerous at worst.
DEF% and HP%
DEF% improves how much damage that Arlan can survive while shielded. Arlan will naturally fall to 1 HP anyway, and additional HP% does nothing to change or slow that. Since Arlan’s Skill consumes a percentage of his Max HP, additional HP% will only marginally increase his survivability while he is at high HP, and since he doesn’t stay at high HP for long, it’s not a particularly useful stat for him. DEF% is the only stat that effectively increases Arlan’s survivability, as it provides damage reduction at all times.
Effect RES
A single Effect RES substat should be prioritized if Arlan is running Broken Keel.
Energy Regeneration Rate%
ATK% Link Ropes are usually superior, but Energy Regeneration Rate% is potentially useful after Arlan’s 6th Eidolon, Self-Sacrifice. Being able to use Arlan’s Ultimate every three turns can help Arlan dispatch summons as soon as they are created.
Character Comparisons
Blade

As a 4-Star Destruction character, Arlan will naturally draw comparison to Blade. The two both share the mechanic of sacrificing HP for power, though they desire completely different team compositions.
Arlan wants Preservation units where Blade wants Abundance units. Blade slowly expends SP over time while Arlan does not spend SP with his Skill, but instead generates SP with his Basic ATK. Arlan makes better use of party-wide buffs, particularly ATK%, while Blade gets more use out of single-target DMG% buffs due to his poor ATK% scaling.
As a result, Arlan can be thought of as being Blade’s equal and opposite, excelling in the team compositions that Blade does not, and vice versa.
Serval

Both Serval and Arlan are 4-Star Lightning characters with powerful AoE options. Where Serval deals sustained AoE damage over an extended period through her abilities and DoT, Arlan primarily deals single-target damage with his Skill and Ultimate’s primary hit. Arlan can only deal AoE damage with his Ultimate, and only to 3 targets at most. His AoE capability does increase at E6, but he still deals mostly single-target damage. Given time, Serval will outpace Arlan’s AoE output, making her better against multiple durable targets, whereas Arlan excels in immediately removing summoned minions, particularly with his 6th Eidolon, Self-Sacrifice.
Notable Synergies
Defensive Options
Arlan requires a Preservation character capable of granting durable Shields in order to utilize his Talent without dying. There is no way around this fact and all of Arlan’s teams must include one in order to maximize his damage potential.
 Gepard | Surviving on a single point of HP is difficult, and Gepard’s durable Shield is one of the few ways to keep Arlan alive at death’s door. Gepard combines being SP positive with his powerful Shield to make himself Arlan’s best teammate in all scenarios. | ||
 March 7th | March 7th is the best alternative to Gepard in case you do not have him. Arlan will not gain additional aggro from March 7th’s Shield when he’s below 30% of his Max HP, which will happen quite regularly. Running March 7th with Arlan can be very SP intensive, even without the increased aggro. Extra care should be taken to ensure your team’s SP budget can stand the strain. | ||
Second Damage Dealer
An SP-hungry character such as Seele or Sushang is often Arlan’s best damage-dealing partner. A second AoE unit can be redundant when Arlan’s Ultimate already has it covered.
 Seele | Seele’s SP consumption is variable based on if and when she triggers her Resurgence Talent. Arlan can adapt well to Seele’s uneven SP consumption, as he uses Basic ATKs to offset Resurgence while otherwise using his Skill. | ||
 Sushang | Similarly to Seele, Sushang can consume many SP in a short time, especially without her E1 and when the enemy is not Weakness Broken. Arlan can easily generate SP for her to use while contributing his own share of damage | ||
 Yanqing | A straightforward Hunt character with powerful single-target Ice damage. Not quite as SP-hungry as E0 Sushang or Seele. Just like Arlan, he prefers shielders such as Gepard and March 7th over other defensive supports, which kills two birds with one stone when selecting Yanqing as the second damage dealer. | ||
 Qingque | Arlan has the ability to help fund Qingque’s gambling addiction, particularly if he acts after her to recover SP should Qingque spend it all. | ||
Buffers and Debuffers
 Asta | Arlan’s best support for Hypercarry, and a good support for Arlan in general as she wants all the same benefits from her teammates that Arlan does. More SPD leads to Arlan speedrunning to low HP, and Asta does not cause Shields given to Arlan to expire prematurely compared to Bronya, as Asta speeds up the entire team instead of advancing just Arlan. Asta’s SPD buff also directly leads to more Energy for Gepard or more Shields from March, and Asta’s DEF% Bonus Abilities from her Traces increase the value of Shields on her. In Hypercarry teams, Asta will act as the sink for SP and can achieve 100% Ultimate uptime if she has her 4th Eidolon. | ||
 Yukong | Yukong is Arlan’s best buffer in teams with Gepard. Her massive increases to CRIT and ATK pair exceptionally well with Arlan’s exceptionally high DMG% stats. Both Arlan and any other damage-dealing teammate benefit heavily from Yukong as long as the team is speed-tuned effectively, making her effective in both Double Damage Dealer and Hypercarry teams. | ||
 Pela | Pela has the potential to go completely SP positive when using Before the Tutorial Mission Starts, giving her the ability to fuel March 7th should Gepard be unavailable. When used with Gepard, Pela may result in too much SP going unspent. | ||
 Silver Wolf | Silver Wolf adds an element of randomness to team compositions, as all shielding Preservation units are Ice-Type and it is unlikely that Arlan will be paired with another Lightning-Type damage dealer or Tingyun in Double Damage Dealer teams. Her DEF Shred and All-Type RES Shred are both exceptionally strong and being able to Weakness Break enemies is always important. | ||
 Tingyun | Tingyun’s ability to grant additional Energy can make Arlan’s Ultimate more readily available, allowing him to immediately clear summons. An effective support in Hypercarry in particular, where the single target nature of her buffs is less of a problem. | ||
Notable Anti-Synergies
 Healers | Healing Arlan reduces the strength of his Talent, Pain and Anger, which significantly reduces his damage potential. While it is possible to run Arlan with Abundance characters, it is often better to simply run a different unit. | ||
 Blade | Blade and Arlan are equals and opposites, and their desired teams have no real overlap. Pairing them together does not change this fact. Teammates that benefit Blade (such as Abundance units) are unlikely to benefit Arlan and vice versa, making it likely that a team with both of them is disjointed and dysfunctional. | ||
 Bronya | While Arlan loves the additional ATK%, CRIT DMG%, and DMG% that Bronya grants, additional turns cause Arlan’s Shield from Preservation units to expire faster and Bronya’s SP hunger can cause Arlan to have to Basic ATK more often in order to generate SP for the other damage dealer. As a result, Bronya should not use her Skill on Arlan. This changes with E1 and But The Battle Isn’t Over, as Bronya’s SP costs are significantly reduced. Though she should not be targeting Arlan with her Skill beyond the earliest stages of the fight, her Ultimate is immensely impactful for Arlan. | ||
Teams
Double Damage Dealer

Arlan’s best team composition, allowing Arlan to flexibly generate SP and deal damage without interrupting the flow of other characters.
The second damage dealer includes all options discussed above, including Qingque. Often, a Hunt character synergizes well due to Arlan’s AoE coverage, but this might not always be the case.
Example Teams
SP Balancing

Perhaps the best example of Arlan’s SP balancing in action. Yukong is free to go SP neutral, with Arlan able to balance out the team’s SP costs if Seele uses lots of SP.
Budget Team

Pela’s constant Basic ATKs can support March 7th’s shielding, while Arlan can generate SP as needed based on Qingque’s SP usage, allowing the team to manage its SP efficiently.
Hypercarry

While far from his ideal role, Arlan can be played as the sole damage dealer of a team. This tends to be more useful for early game players or those saving their Stellar Jade for a specific character. As he does not use SP, it becomes easy to run SP-negative supports such as Asta. In general, Hypercarry Arlan should run Asta. She gives him more actions, synergizes with shielders, is free for all players, and has considerable personal damage potential through her Skill’s high multipliers and the ease of building Break Effect.
Bronya should be avoided, as she makes Arlan’s Shields expire faster.
Example Teams

One of the most budget-friendly teams in the game, consisting of two free characters and two 4-Stars occasionally available from the shop. Arlan and Asta make a potent duo, particularly if Asta is built offensively. Pela can equip Guard of Wuthering Snow and be built defensively to reduce March’s need to consume SP.

The Gepard version of Arlan Hypercarry. As long as Yukong acts before Arlan and Asta, the team runs well. Asta’s Ultimate makes Gepard’s Shield more reliable, as taking more actions relative to enemies leads to more shielding.
Credits
AnemoneMeer
MasterDank47
michelle
skylarke
Changelog
- September 17th 2023: Published for v1.3
- September 20th 2023: Uploaded Infographic